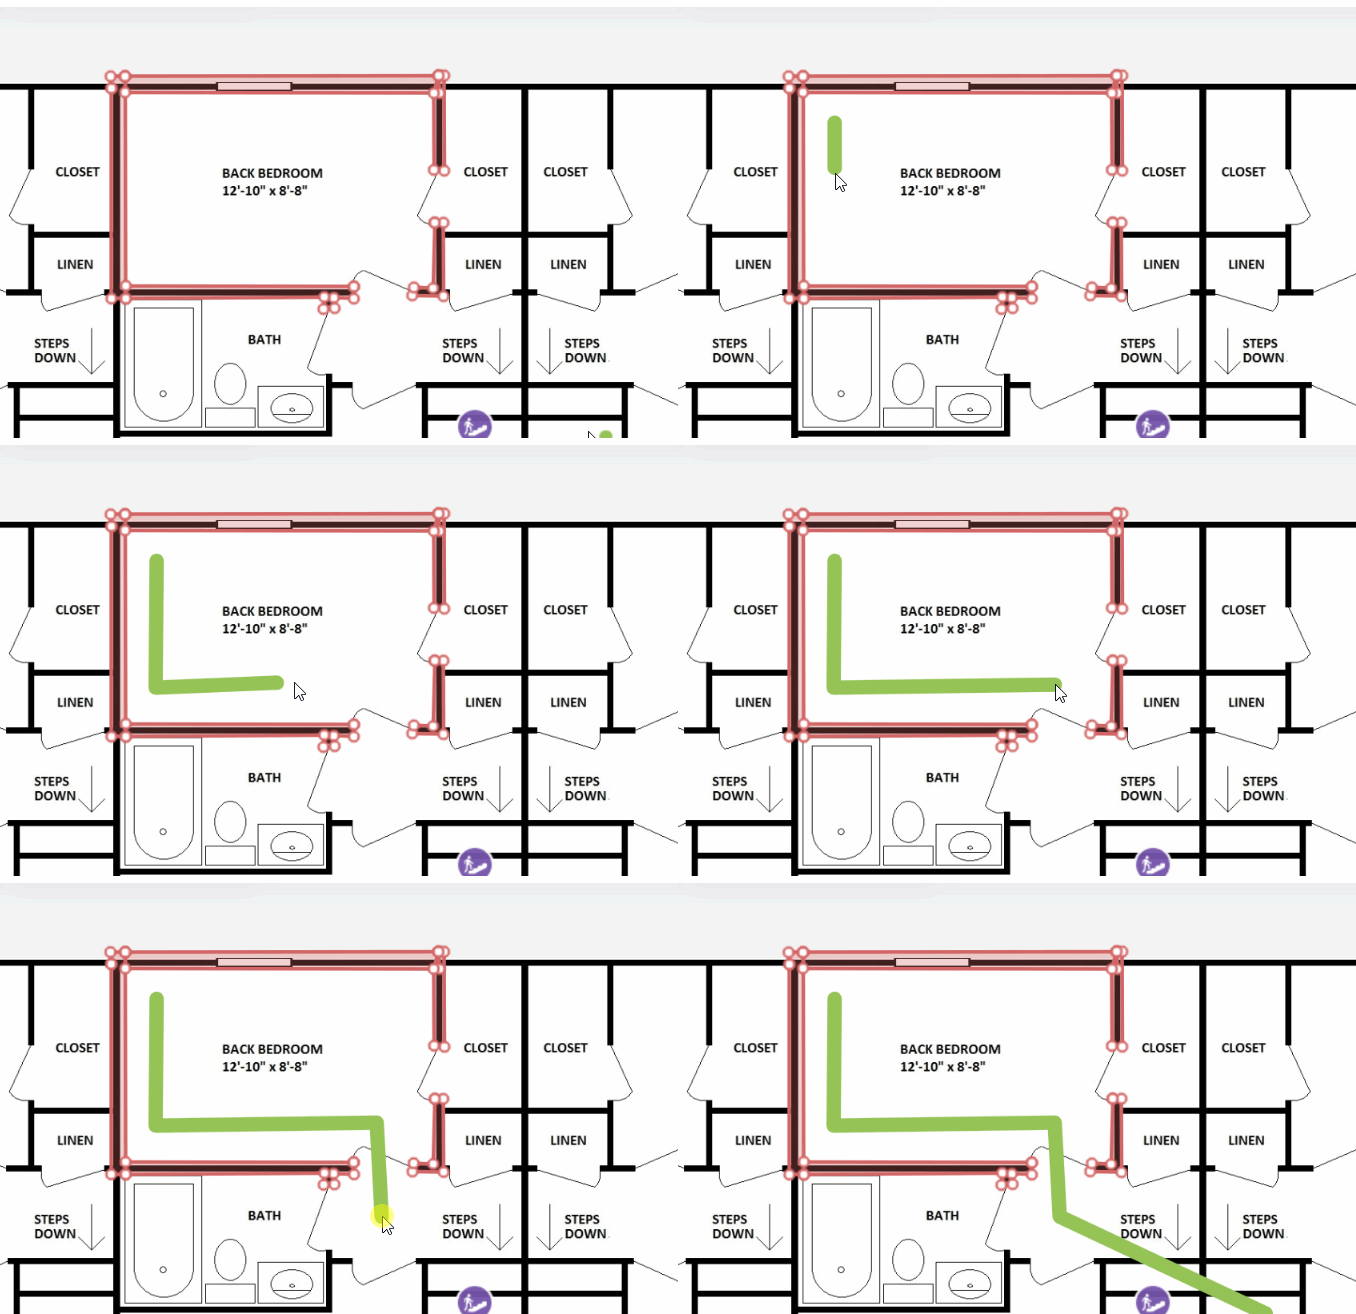
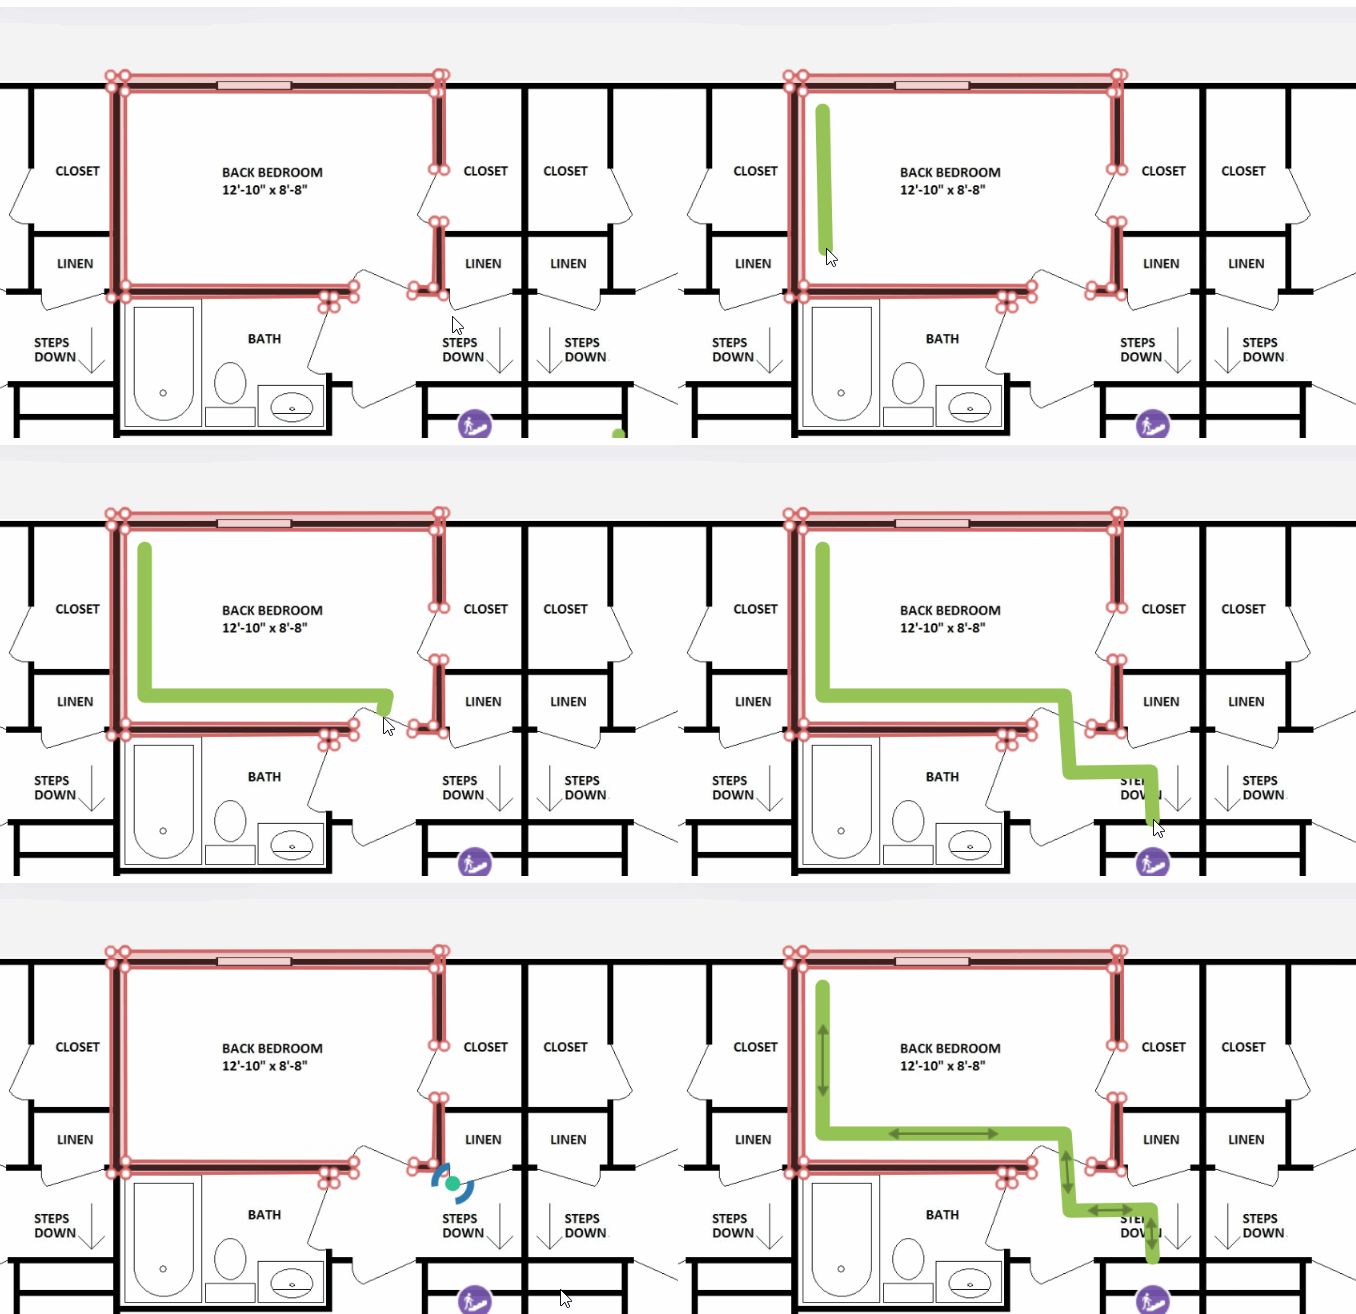
Re-create the most commonly used paths in the area. This will serve as a foundation for creating navigation routes from the current location to any reachable place on the map. The route will be shown as a green line on the map.
- To create a route, activate the "Draw route" button in the "Create" section of the toolbar.

2. Click on various points on the map to mark the vertices of the route. To draw a route, click on the map once to specify the starting point of the route and then drag the green line along the desired path. To add a reference point, click on the map once and continue drawing. At least two reference points in the direction of the desired route should be specified.

- Once the last vertex is added, either click the last added mark again, double-click on the place where the route should end or press Enter. Double-sided arrows will appear.

-
For multi-floor locations, add elevation points between the adjacent floors. To do this, press on the end of the route where a set of stairs, lift or elevator is located.
-
Click the "Save" button in the top right corner of the toolbar to save the changes."
