Navigine offers developers the location SDK software package for indoor navigation, which can be implemented in mobile applications to provide location-powered capabilities and functionality. The Navigine Indoor Navigation SDK is a set of algorithms that solve a wide range of location-based tasks. Using this system, users can create handy apps for smartphones on Android and IOS equipped with the indoor navigation function.
Navigine provides a special demo application for iOS to test SDK-powered functionality across different industries and use scenarios. Thus by using the application, a customer can check the features provided by Navigine Indoor Navigation SDK Navigation.
This tutorial is designed to help new users set up and use the Navigine Demo App on their iOS devices. Whether you're looking to navigate a new location or simply want to get familiar with the app, this guide will provide you with all the information you need to get started. From downloading the app from the App store to logging in, choosing a location, turning on Bluetooth, and adding beacons to the map, this tutorial will walk you through each step of the process to ensure a smooth and seamless experience. Whether you're new to location-based navigation systems or an experienced user, this tutorial will provide you with the information you need to make the most of your Navigine app experience.
The following article presents the detailed guidelines for using Navigine Demo Application for iOS. For the Android Demo App please refer to this link.
To install Navigine application for iOS check Navigine in AppStore
Here's a breakdown of each tab
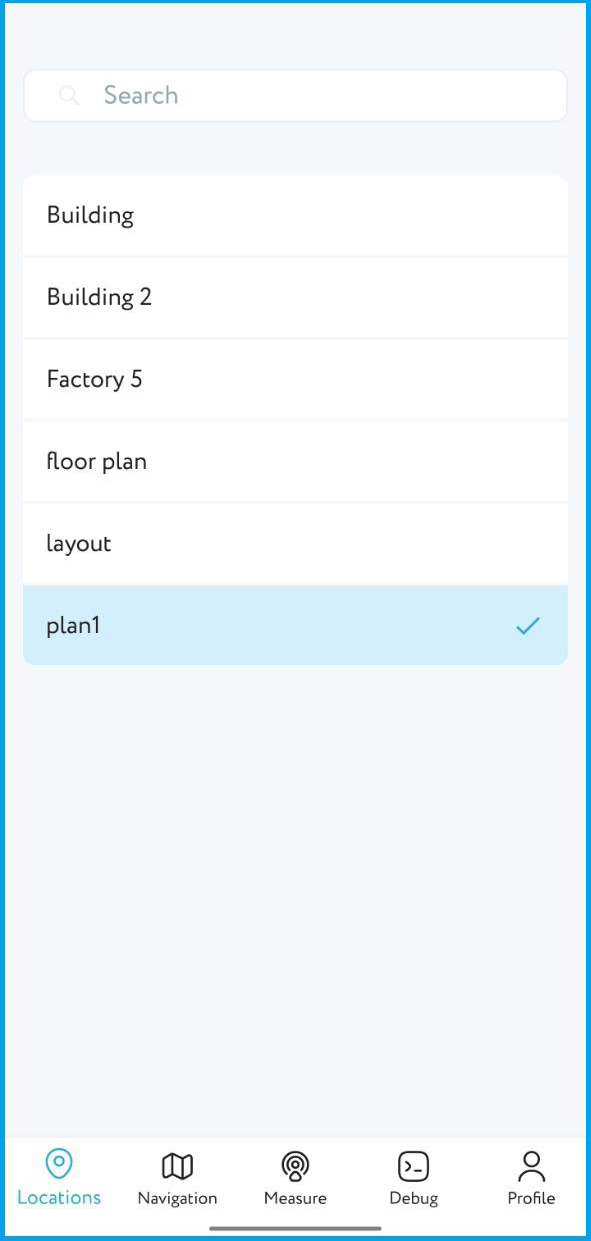
¶ Locations Tab
The Location tab in the Navigine app allows you to select a specific location to navigate. Upon opening this tab for the first time, you must choose a location.
NOTE:If you do not choose a location, you will not be able to access the other tabs.
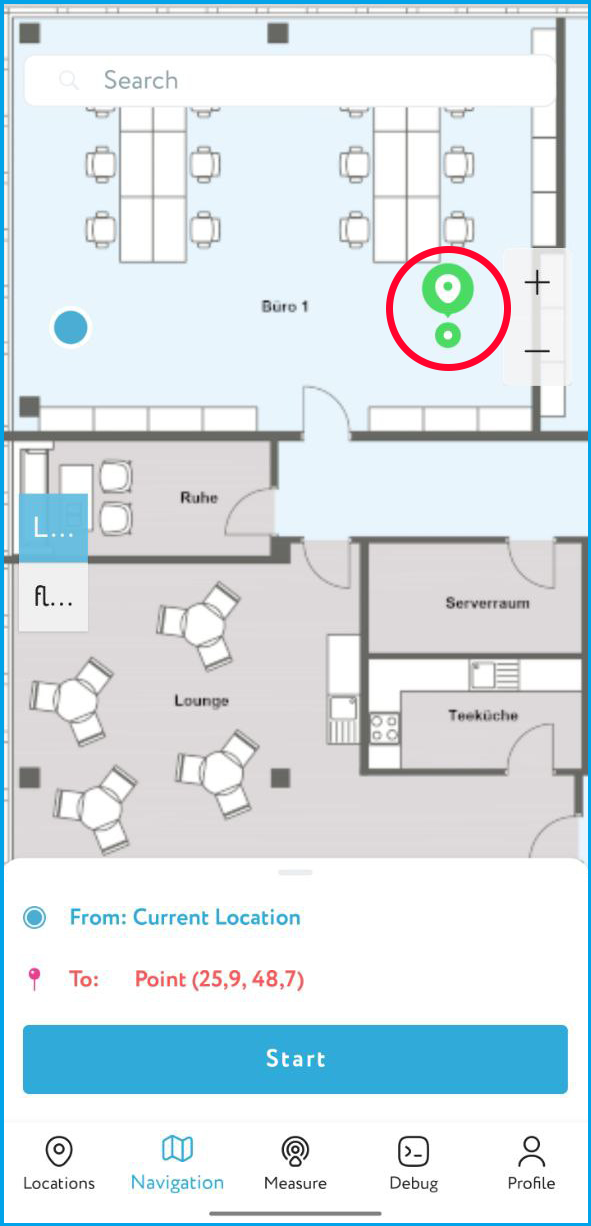
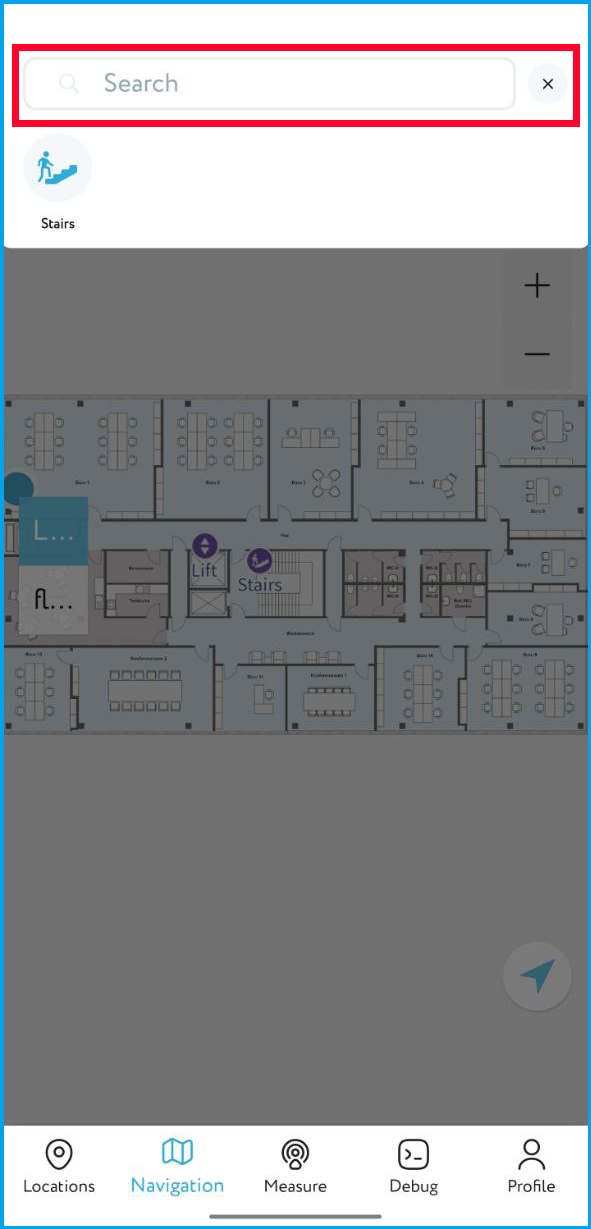
¶ Navigation Tab
In this tab is where you can see your current location on a map and access sublocations for navigating different floors. You can also choose where you want to go and the app will generate a route for you to follow.
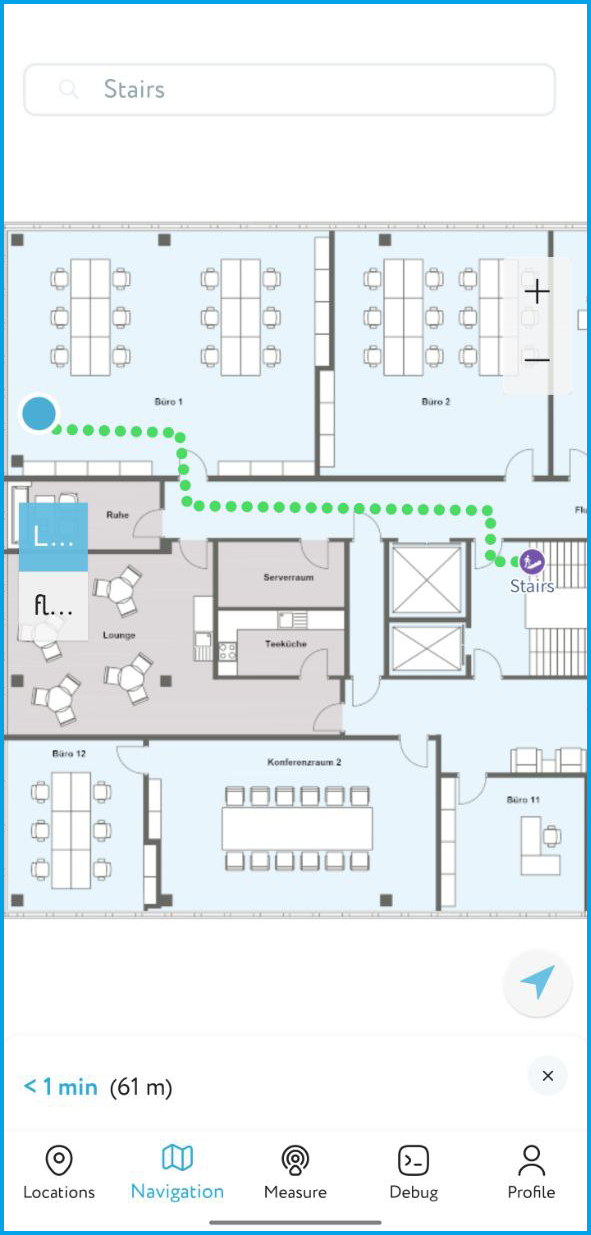
¶ How to navigate to a specific place on the map
- On the map, touch the location you want to navigate to. A green marker will appear on the map.
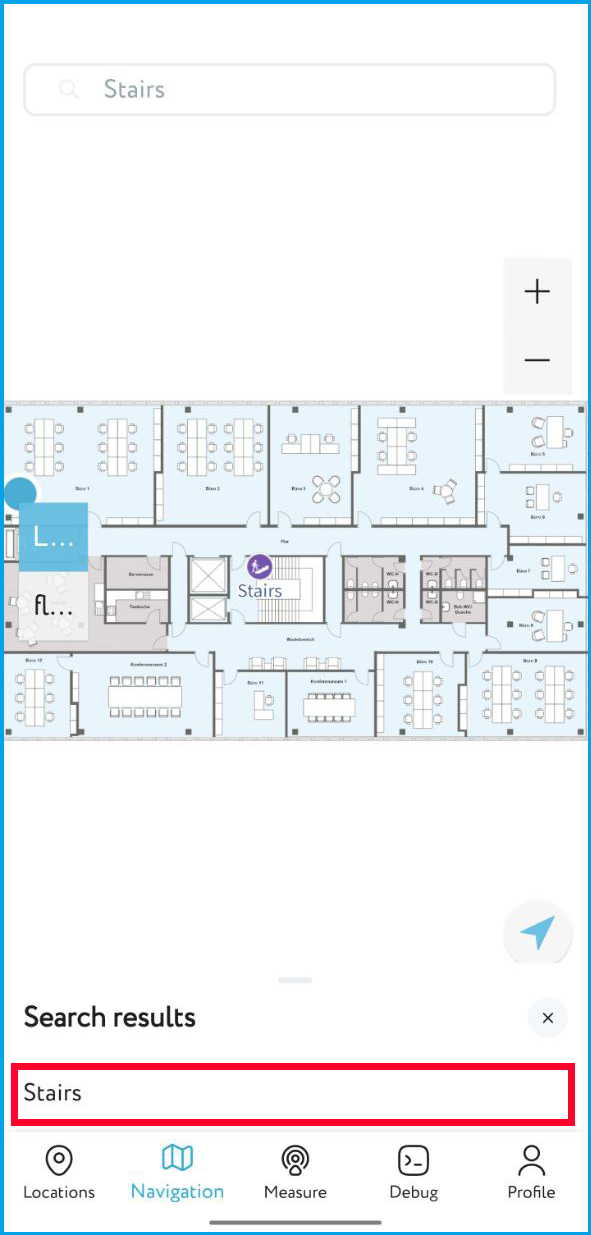
¶ How to use the search bar to find a venue
NOTE: The search bar only finds venues. If you haven't created any venues, the search bar won't find anything.
- Type the name of the venue you want to find in the search bar.
- Tap the name of the venue in the search results.
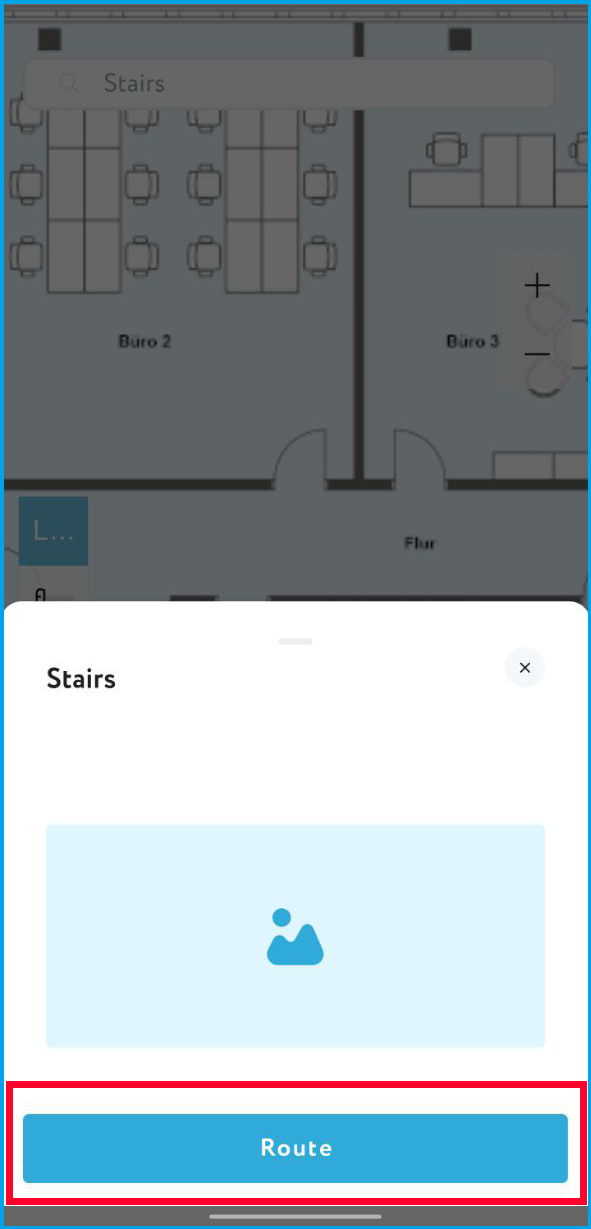
- The app will display the name and image of the venue. Tap the "Route" button to navigate to the venue.
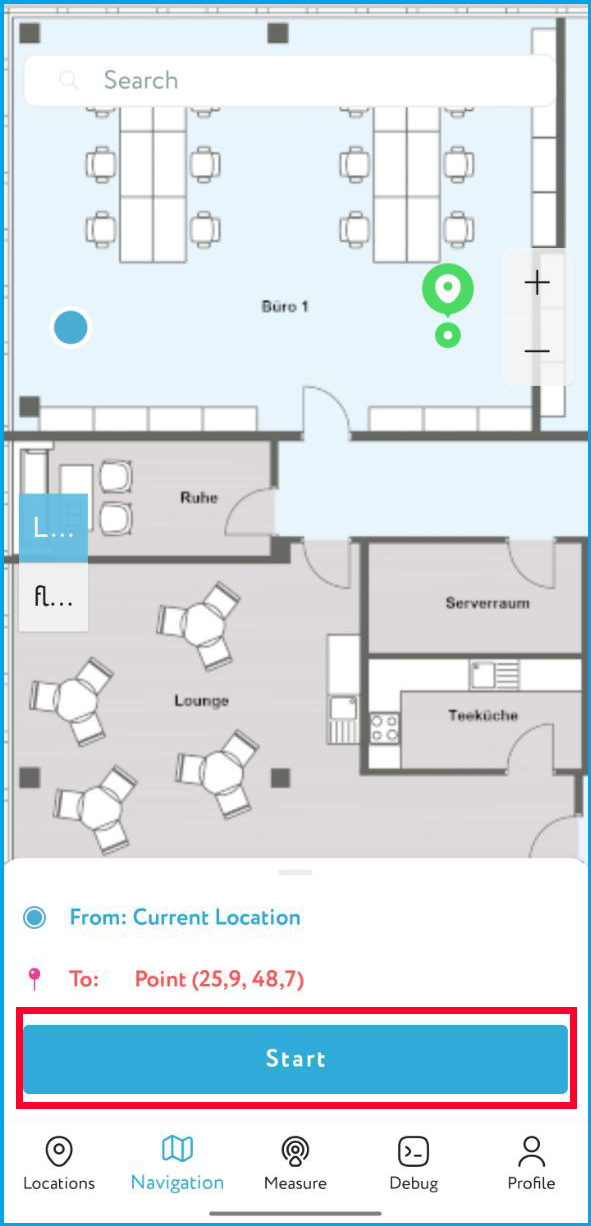
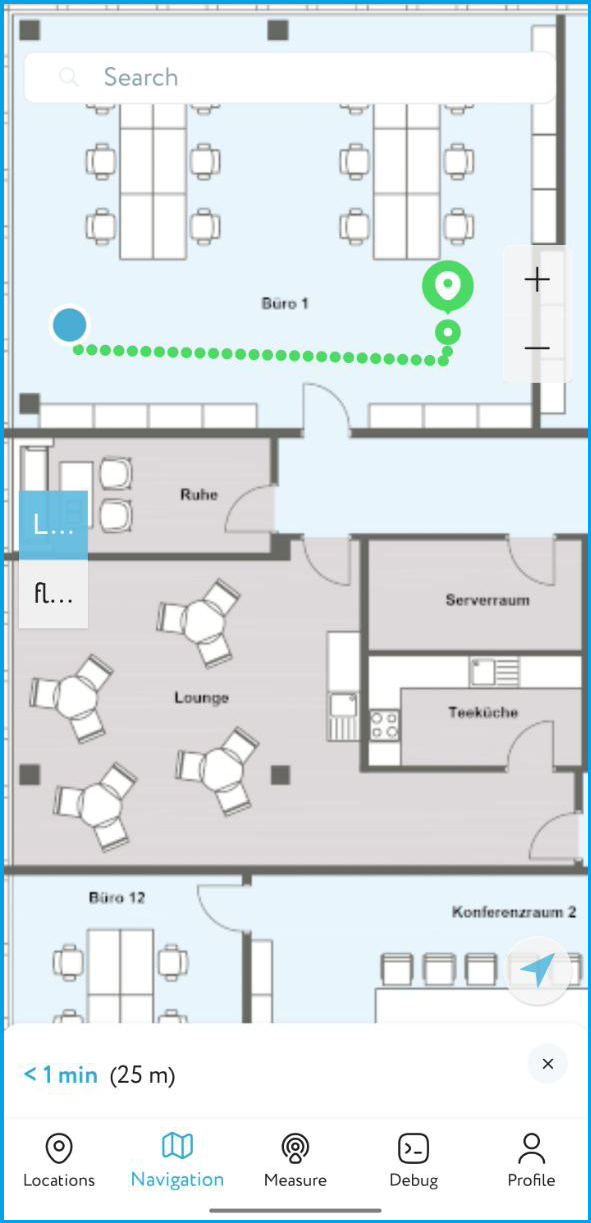
- In the next window, tap the "Start" button to begin navigating to the venue.
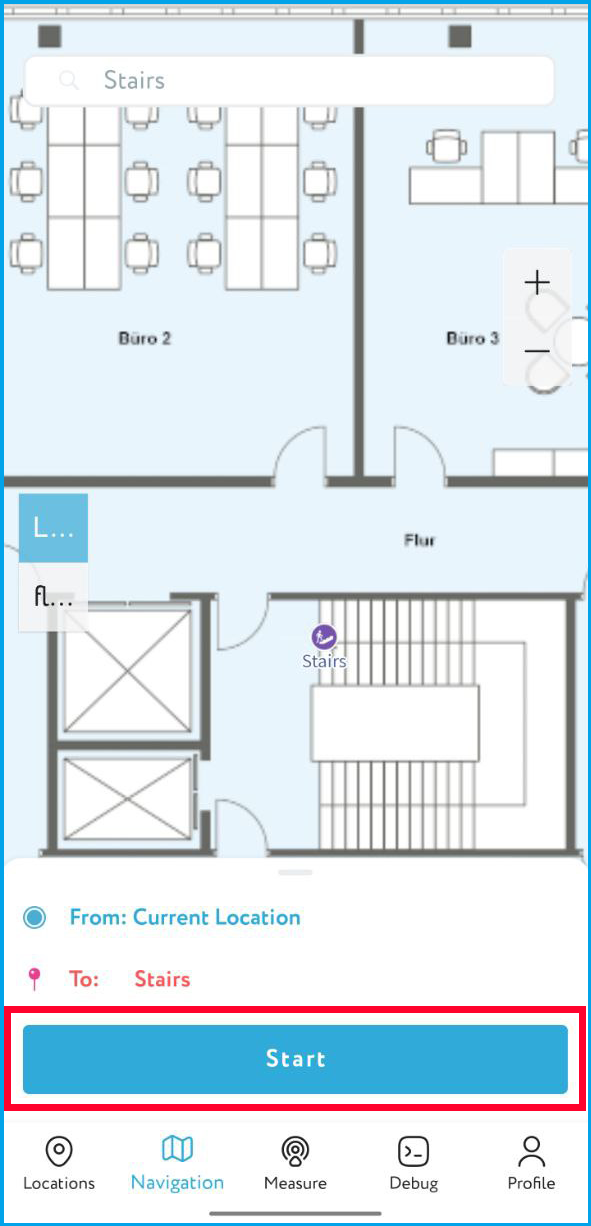
- To cancel the navigation, tap the "X" button.
¶ Measure Tab
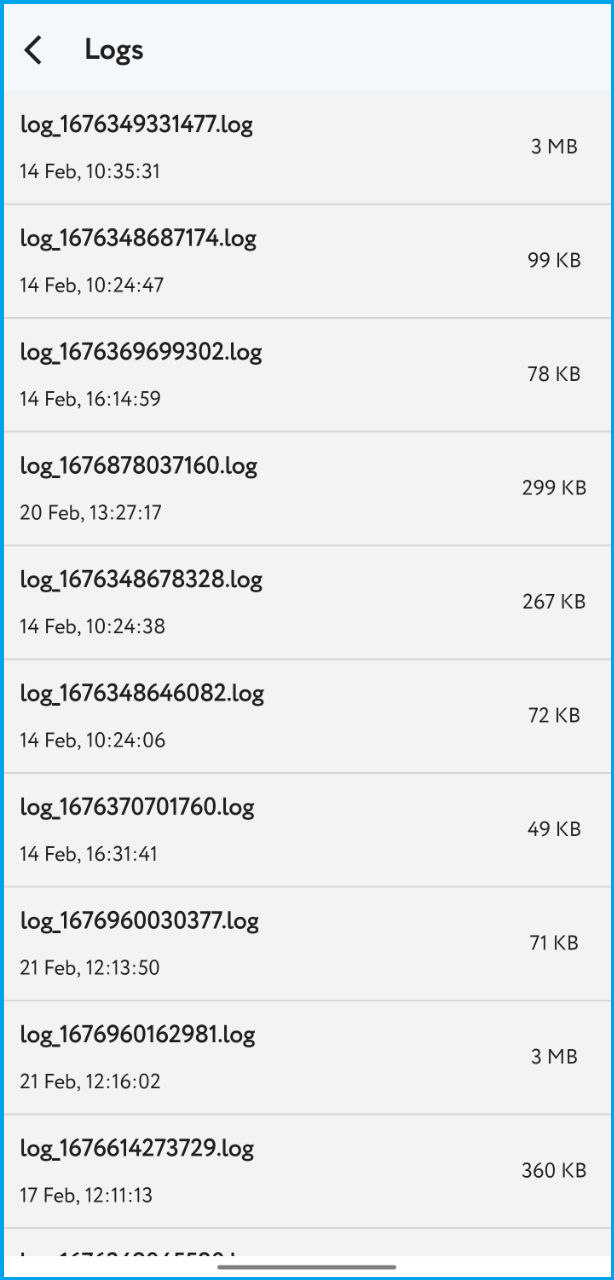
This tab is used to add beacons to the map and measure distances from beacons. You can also see the names of beacons on the map. The Measure tab not only allows you to add beacons on the map and measure distance from beacons, but also has the function to collect logs. The logs collected here can be viewed in the Log Management tab under the Settings section of the app.
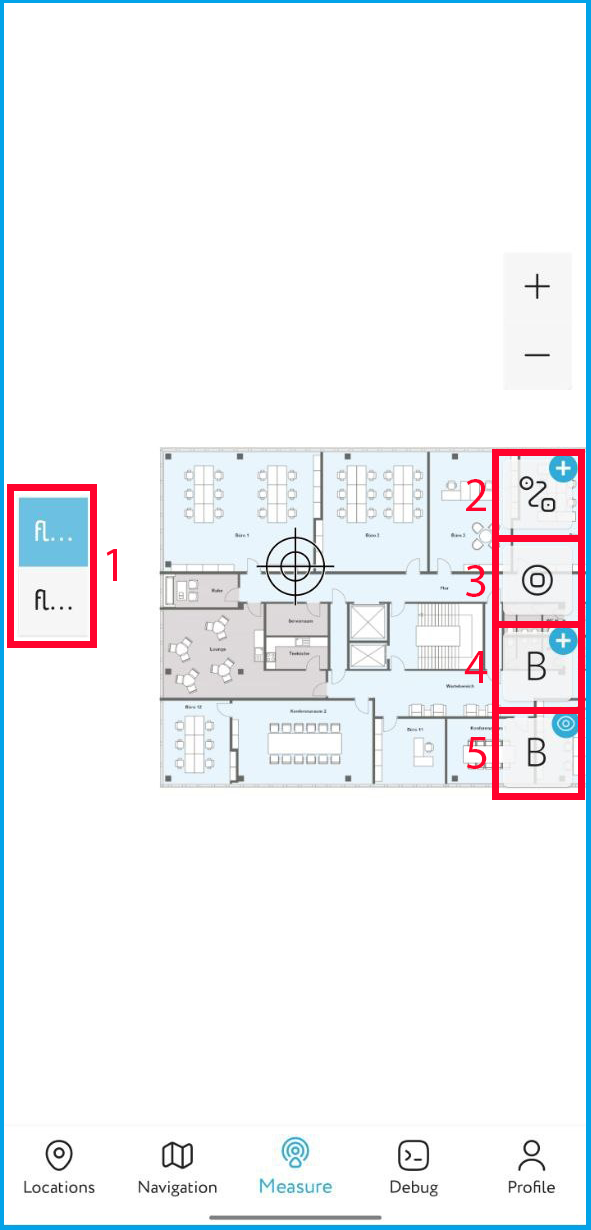
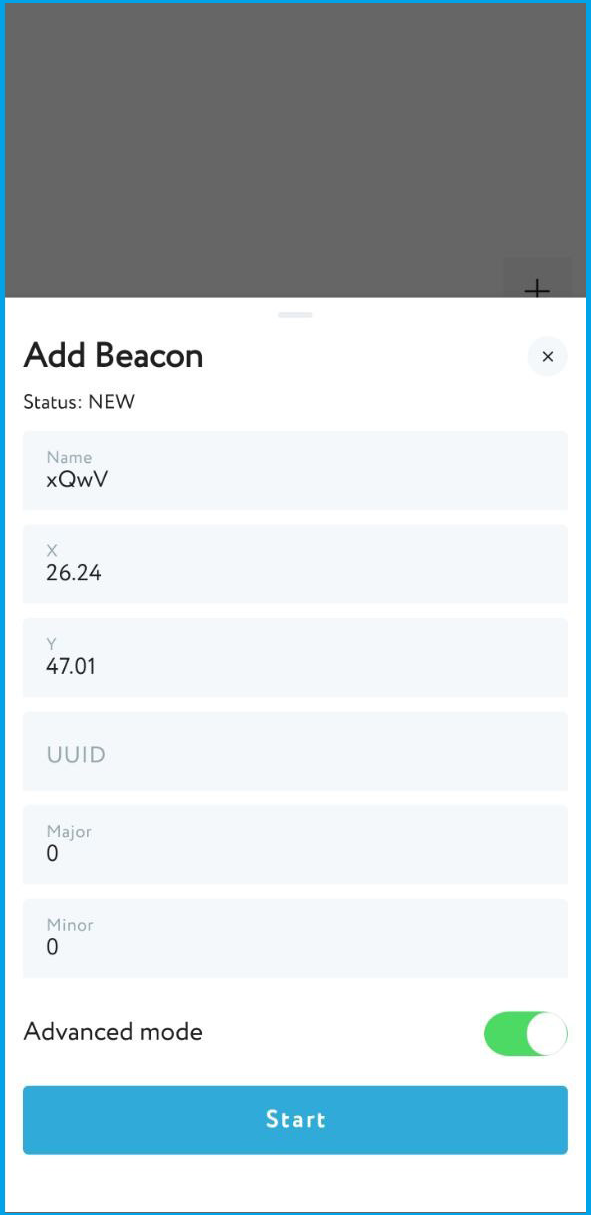
¶ How to add BLE beacons
- Turn on Bluetooth and GPS on your phone.
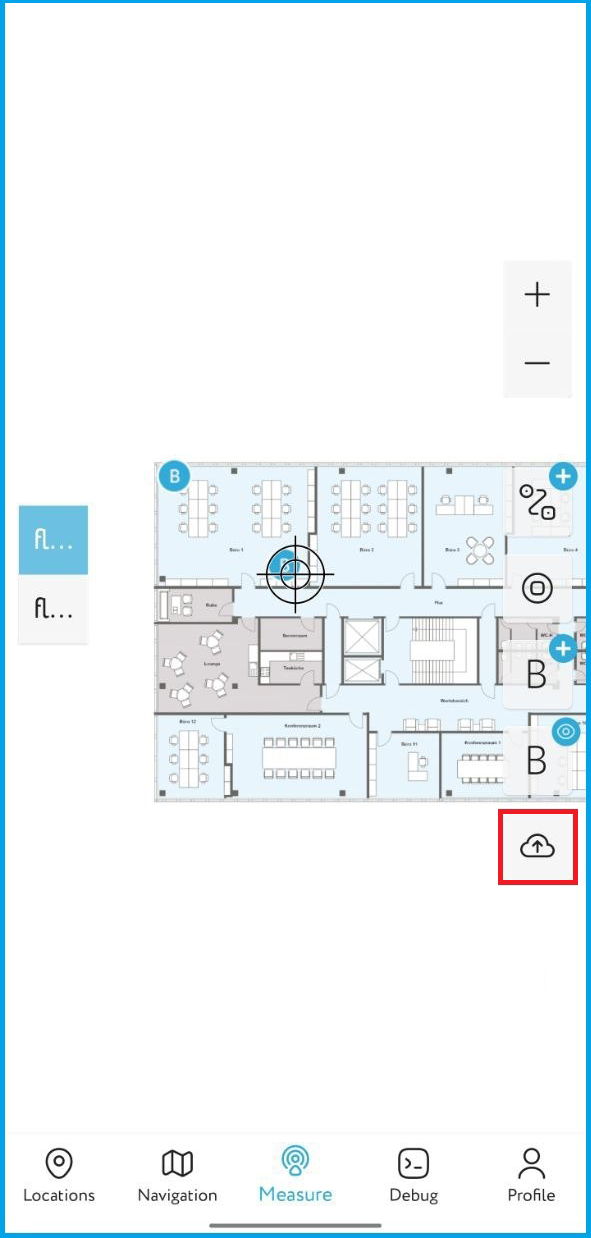
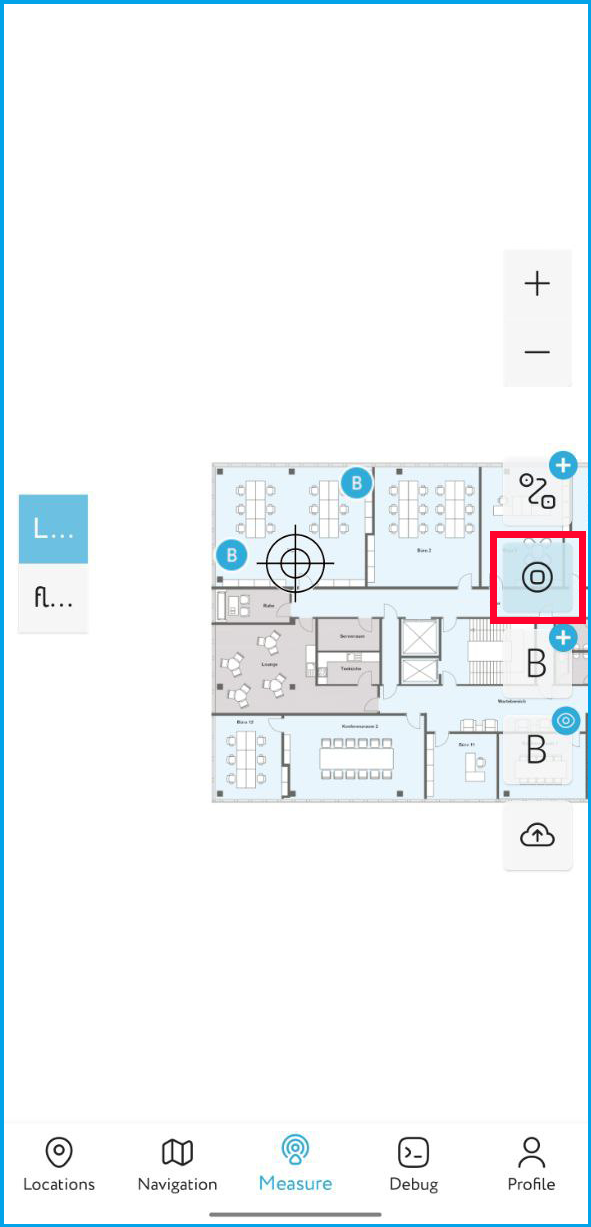
2.1. Add beacons to the map by pressing the "start" button to detect to a nearby beacon. The detected beacon will then be added to the map.
- Press the "cloud" button to upload the added beacons to the server.
¶ How to record log
- Select the location where you want to record logs. You can do this from the top drop-down menu.
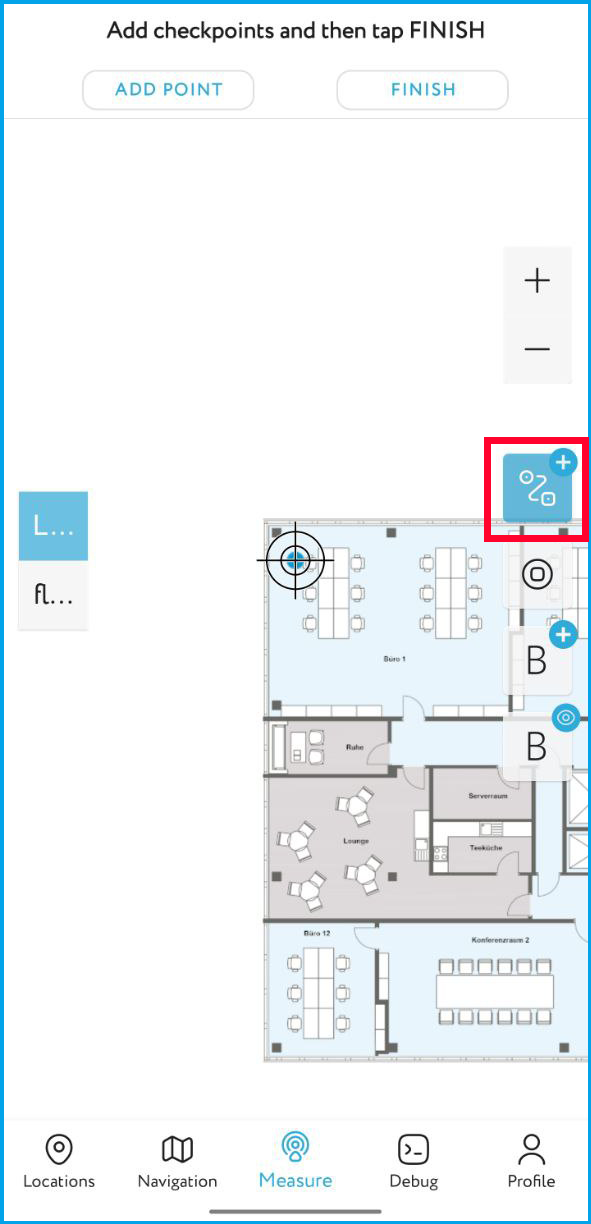
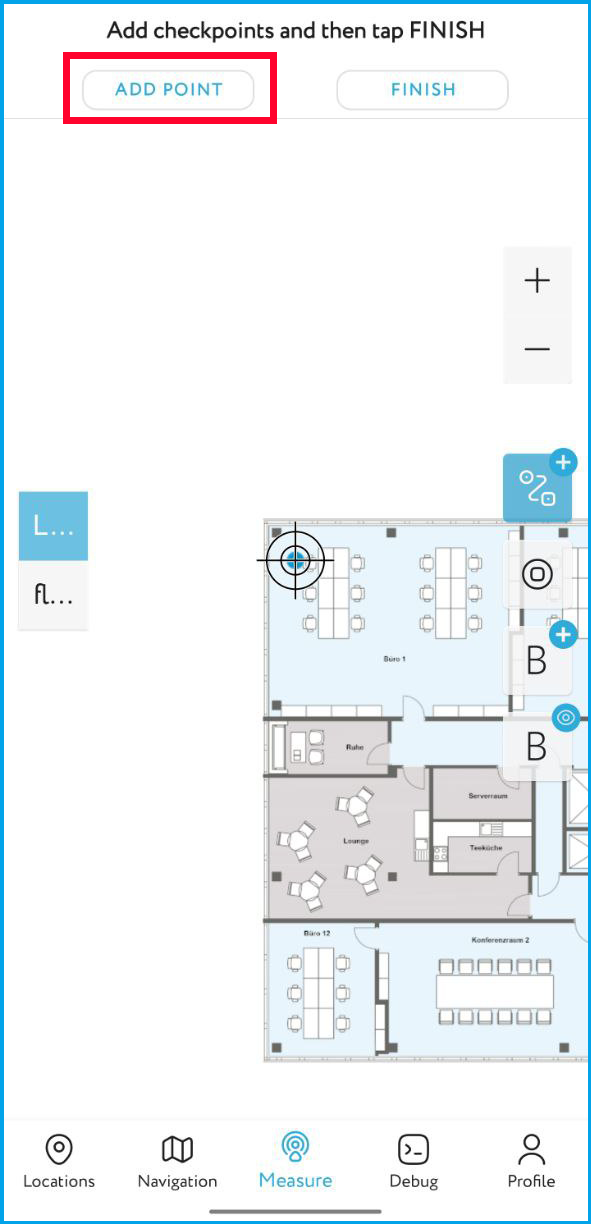
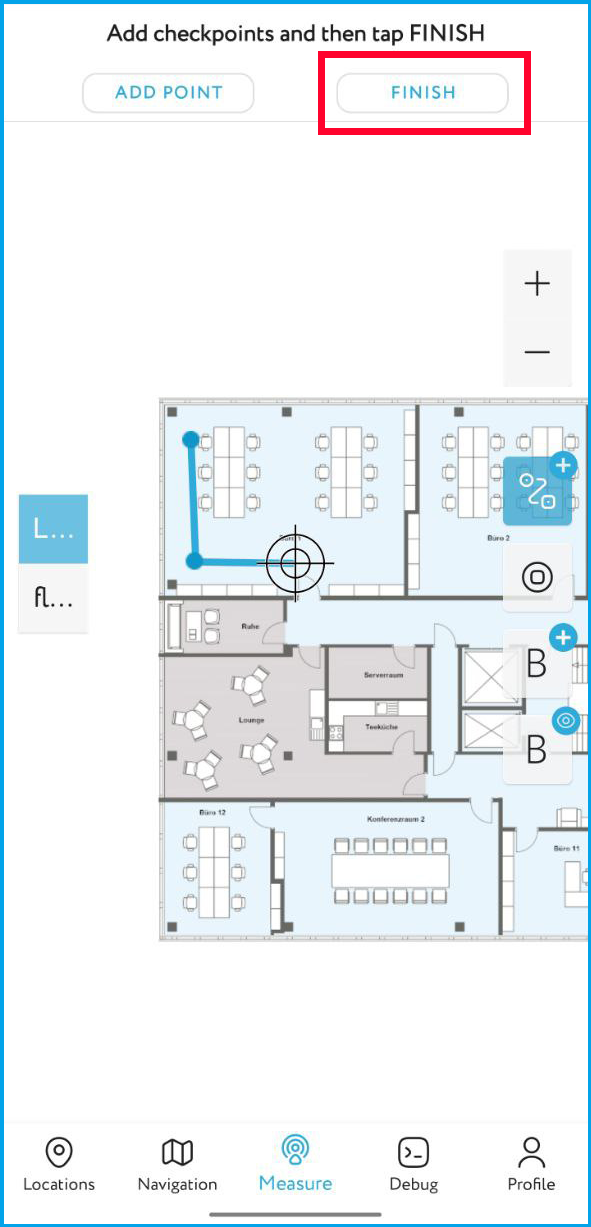
- Specify the route that you will take to record the log. This is known as a polyline and is made up of a set of points that you need to define. The starting point is automatically created at the position of the cursor upon clicking the bottom right button. To add more points, move the cursor to the correct place and click "Add point". When you're finished, click "Finish". If you make a mistake, you can click the bottom right button again to cancel the line.
- Go to the starting point of the specified route and click "Start Measuring". Start walking along the route while recording the log. Please keep a constant speed and avoid stopping.
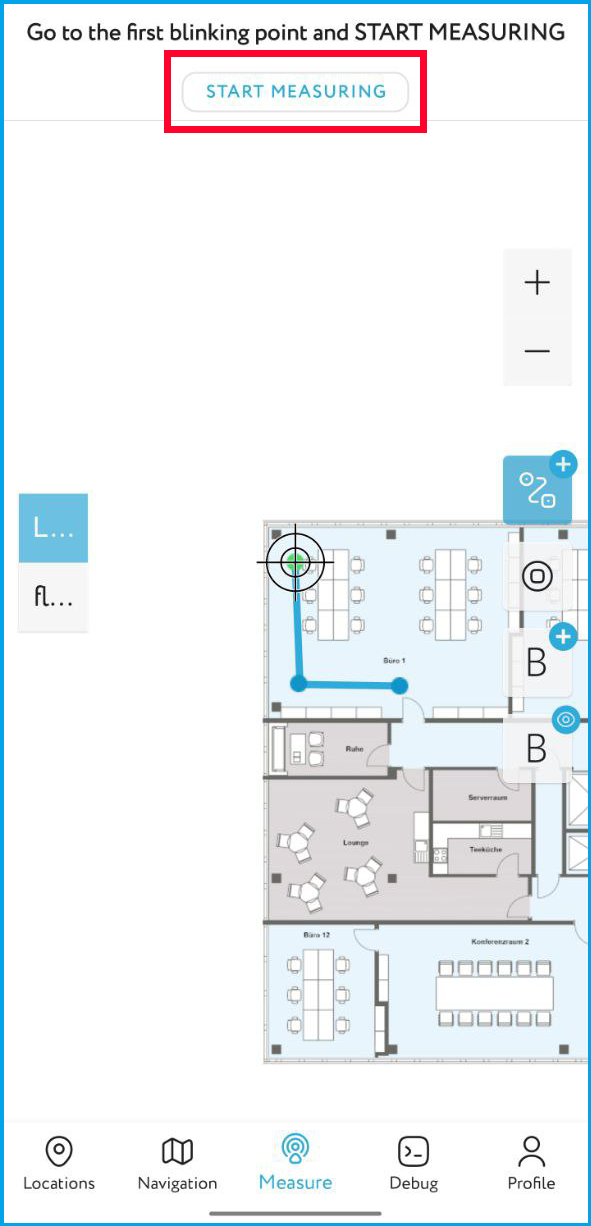
- Each time you pass a checkpoint (vertex), click "Checkpoint" in the application to bind your current position to the current time label. All passed points and sections will be marked with green color.
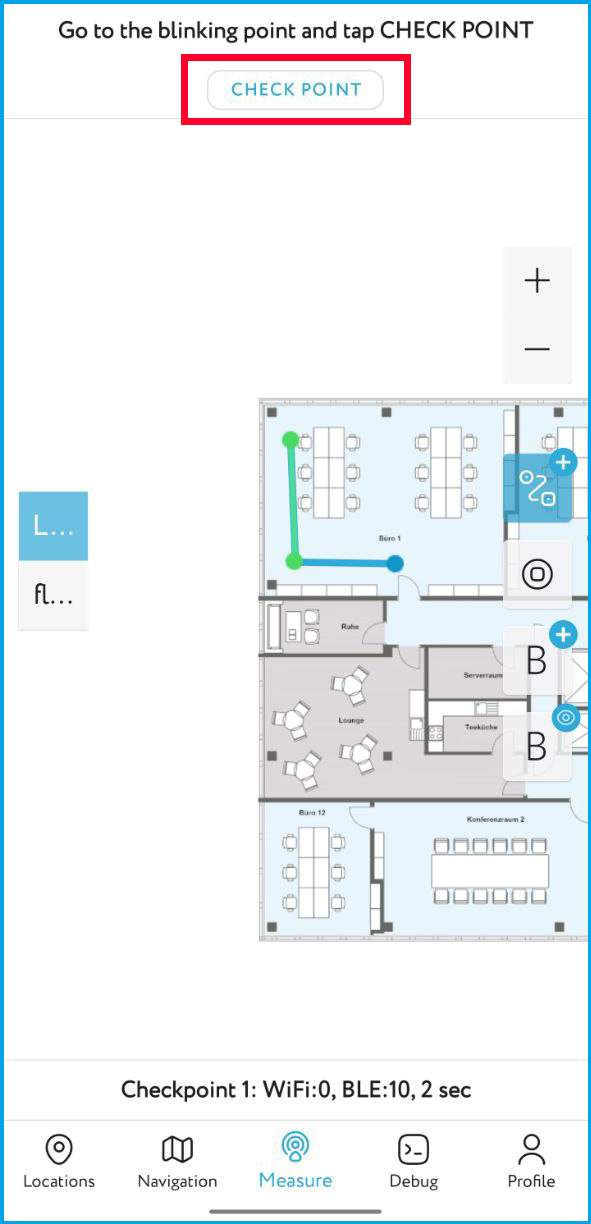
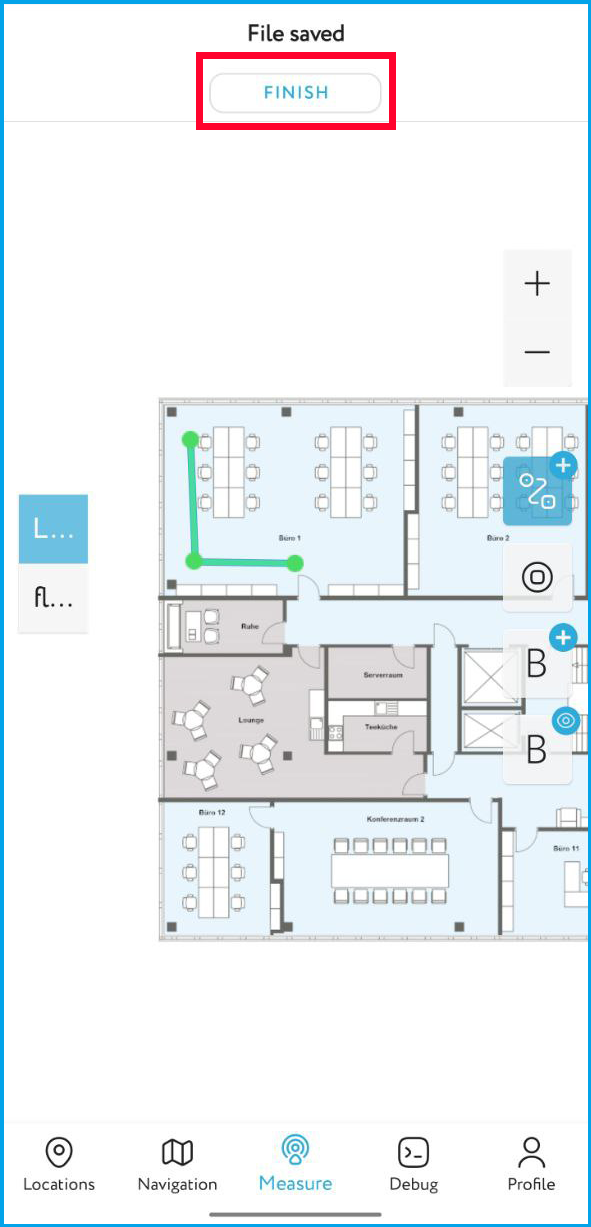
- After the last checkpoint, you will see the name of the resulting log file. Click "Finish".
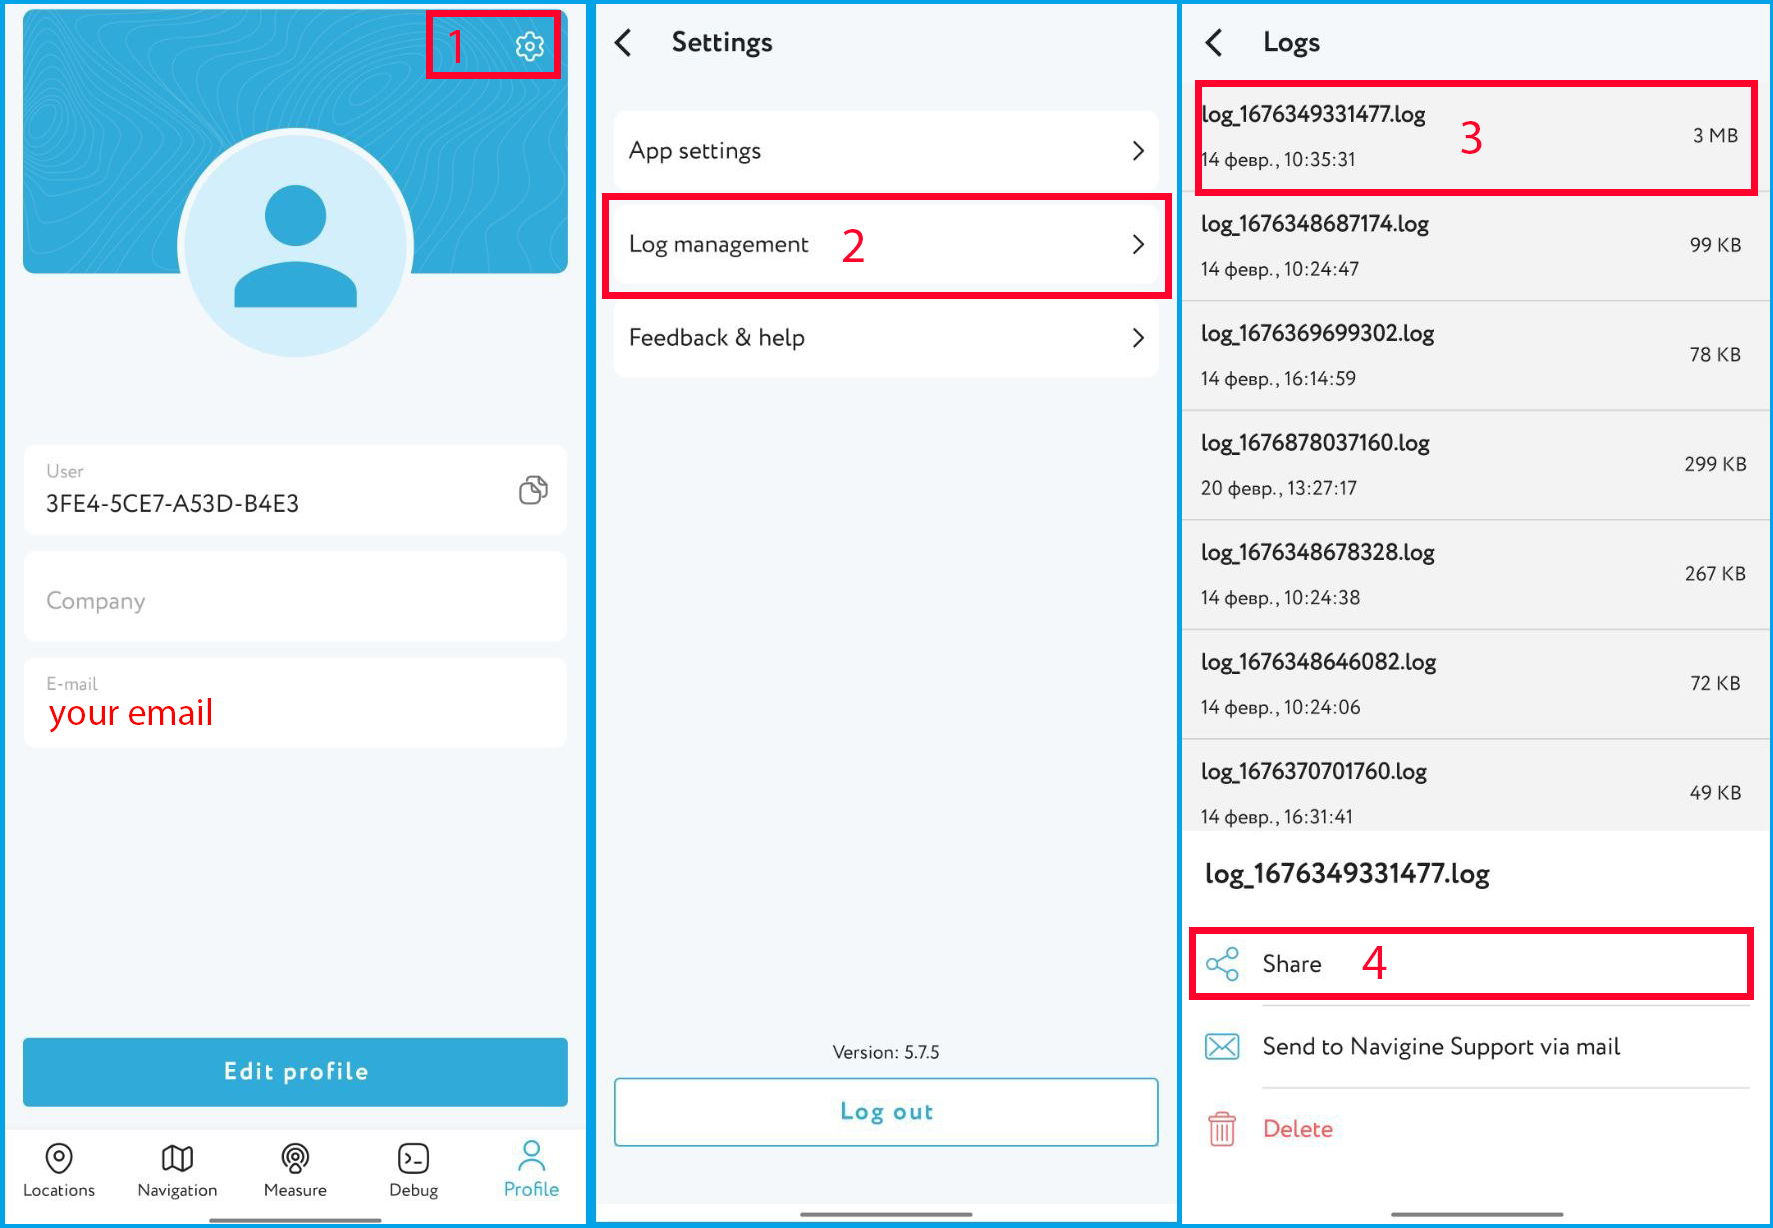
- To share the log file, go to the "Profile" tab, then click "Machine Wheel" in the top right corner, followed by "Log management". Tap on the file name and then click "Share".
NOTE: To avoid mistakes, try to avoid overlapping points and select simple long routes with equally distributed points. To know more about how to correctly record log go to this link
¶ How to record static log
- Click on "Measure Static Log" button.
- Click on "Start Measuring" to begin the recording process.
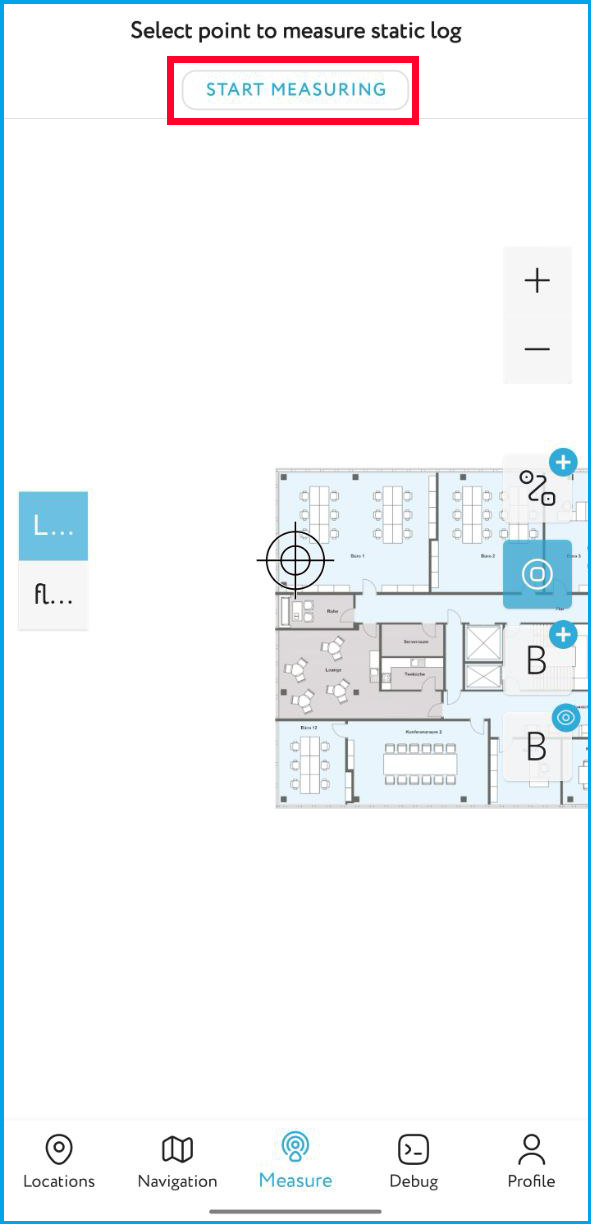
- Stand still for two minutes while the recording takes place.
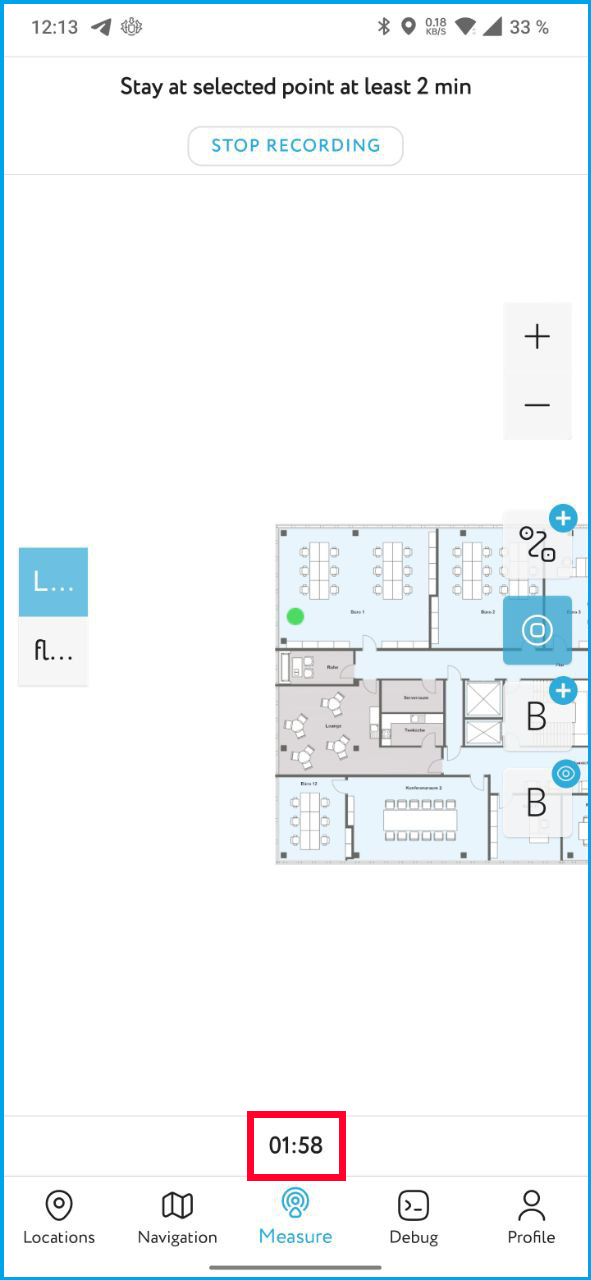
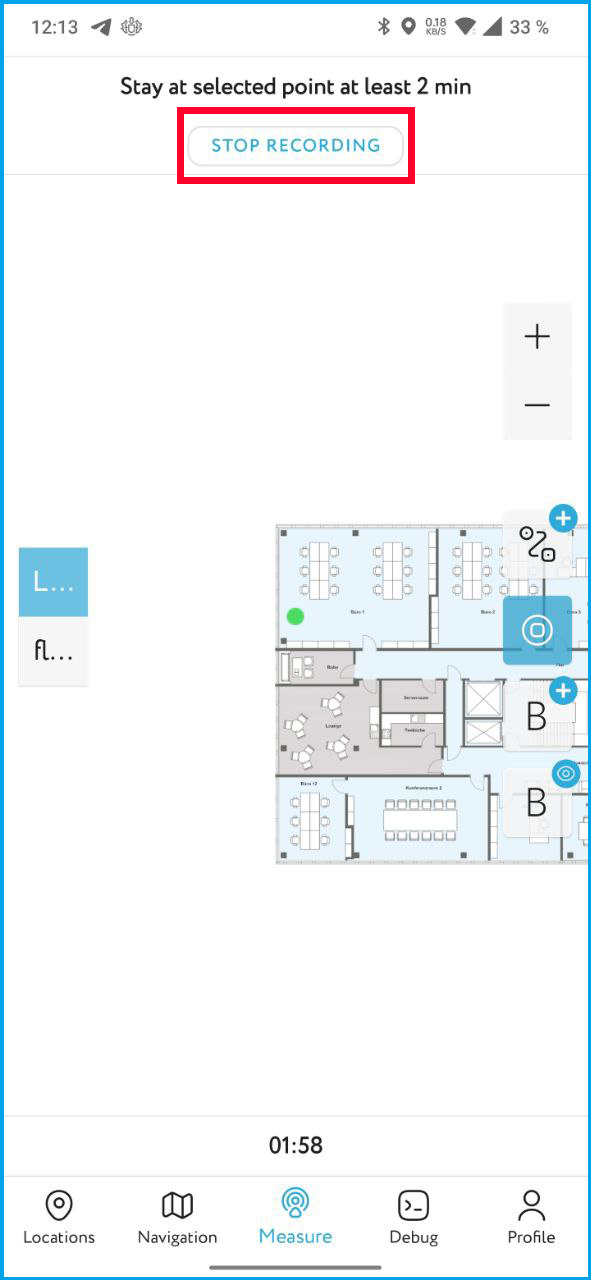
NOTE: Recording a static log is useful when you need to address a problem where your position is constantly changing even when you are staying still. By performing a static log recording, you can create a baseline measurement of your stationary position, which can help improve the accuracy of your location tracking.
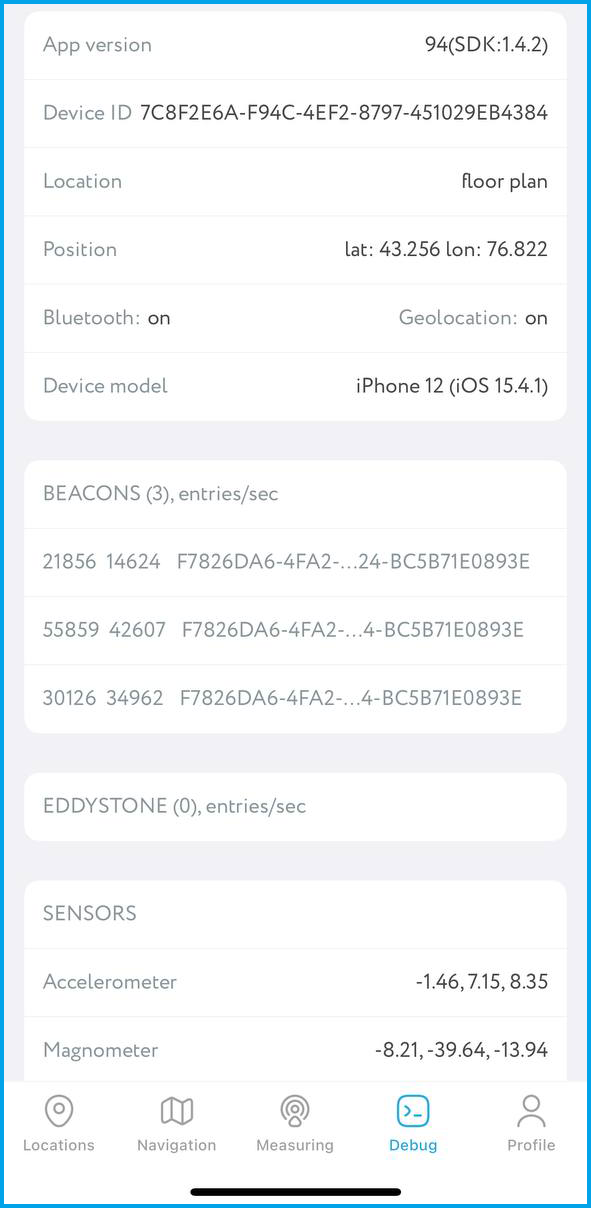
¶ Debug Tab
The Debug tab is used to monitor data and check the performance of the app.
- For beacon navigation, check the "BEACONS" section for the "entries/sec" number. A number above 3.0 means the location is configured properly with installed beacons.
- If the number in brackets (total visible devices) is less than the number of installed beacons, some beacons may not be working.
- WiFi scanning requires WiFi to be turned on, and new signal entries should be visible.
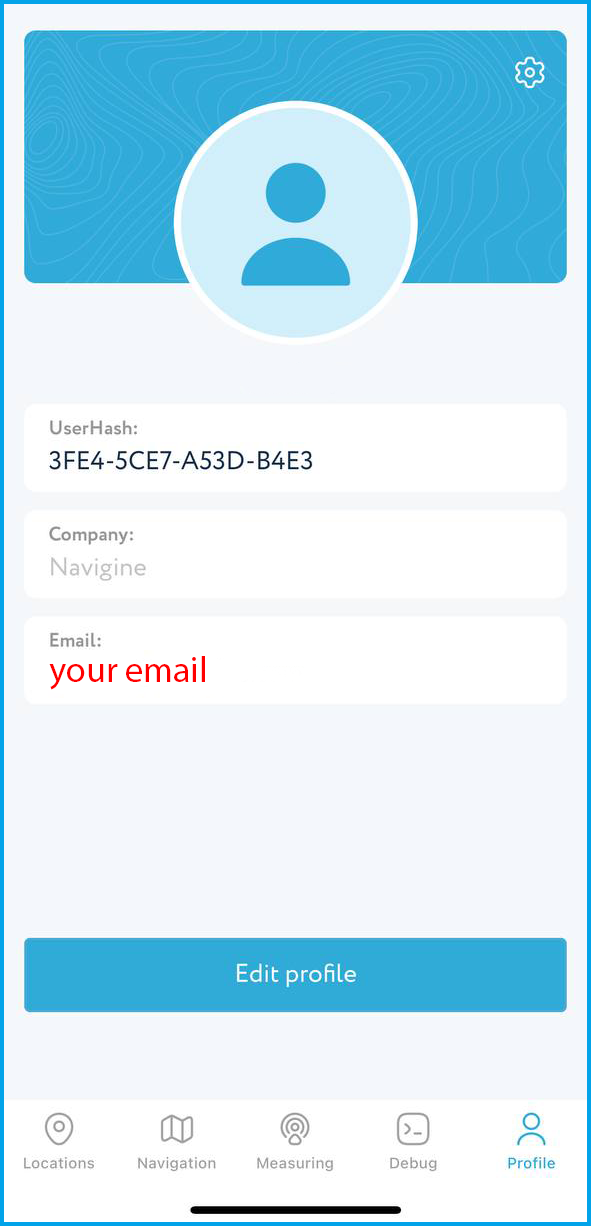
¶ Profile Tab
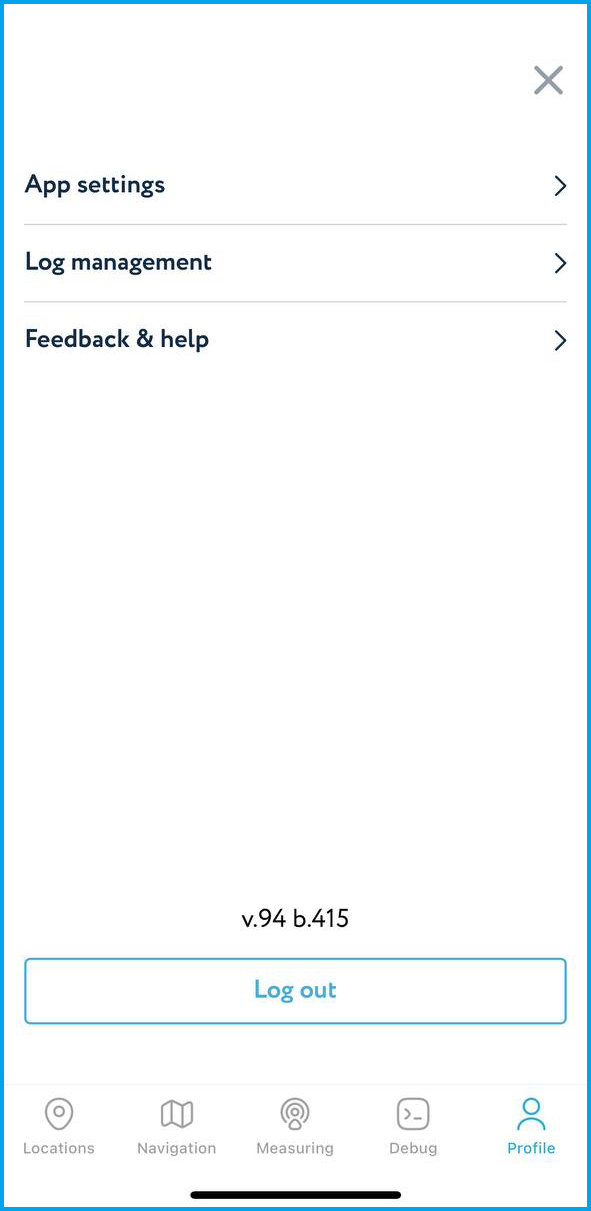
This tab contains your personal user information, as well as access to settings.
-
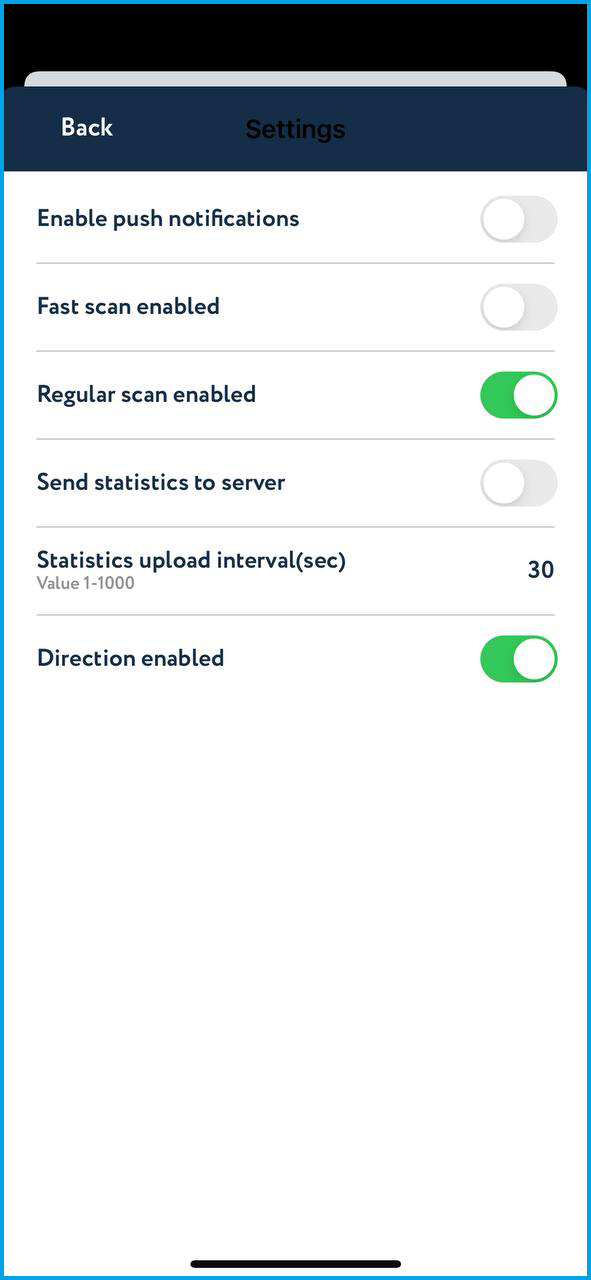
The App settings allow you:
- to enable or disable push notifications;
- to enable or disable fast scan;
- to enable or disable regular scans;
- to send statistics to the server;
- statistics upload interval (sec);
- to enable or disable direction; -
The Log management section is used for technical support from the Navigine team.
-
The Feedback & Help section leads to the documentation page,
-
Displays the current version of the app.
-
You can also log out from the app using the Log Out button.