Instructions for Teltonika Wearable Device Tracking
¶ Hardware setup
¶ Step 1: Initial Setup
- On the website, we download the driver for the COM port. An archive is downloaded that needs to be unpacked and the driver installation must be started.
https://wiki.teltonika-mobility.com/view/Firmware_and_Configurator_downloads
![]()
- Then we move on to downloading the configurator and firmware.
- Click on "Download Stable Version".
https://wiki.teltonika-mobility.com/view/TMT250_Firmware_and_Configurator
![]()
- Click on "Download All" and an archive will be loaded which we will then unpack.
https://wiki.teltonika-mobility.com/view/TMT250_Stable_firmware
![]()
-
Inside the archive, there is the configurator and firmware. We need the configurator.
-
After launching the configurator, it will scan the ports, and if the driver is installed, the device will appear in the list.
![]()
¶ Step 2: Configure Data Sending
- Open the configurator software and select your device
- Go to the GPRS mode and configure the APN server
- Specify the domain, port, and TCP protocol of the Navigine server
![]()
¶ Step 3: Enable Bluetooth Mode
- Go to the Bluetooth mode
![]()
![]()
Note: you can watch video of setting up teltonika
¶ Advanced Configuration
For advanced configuration, follow the instructions for TMT250 and GH5200
Note: Teltonika wearable devices use both BLE beacons and GPS for tracking indoors and outdoors, respectively.
¶ Software setup
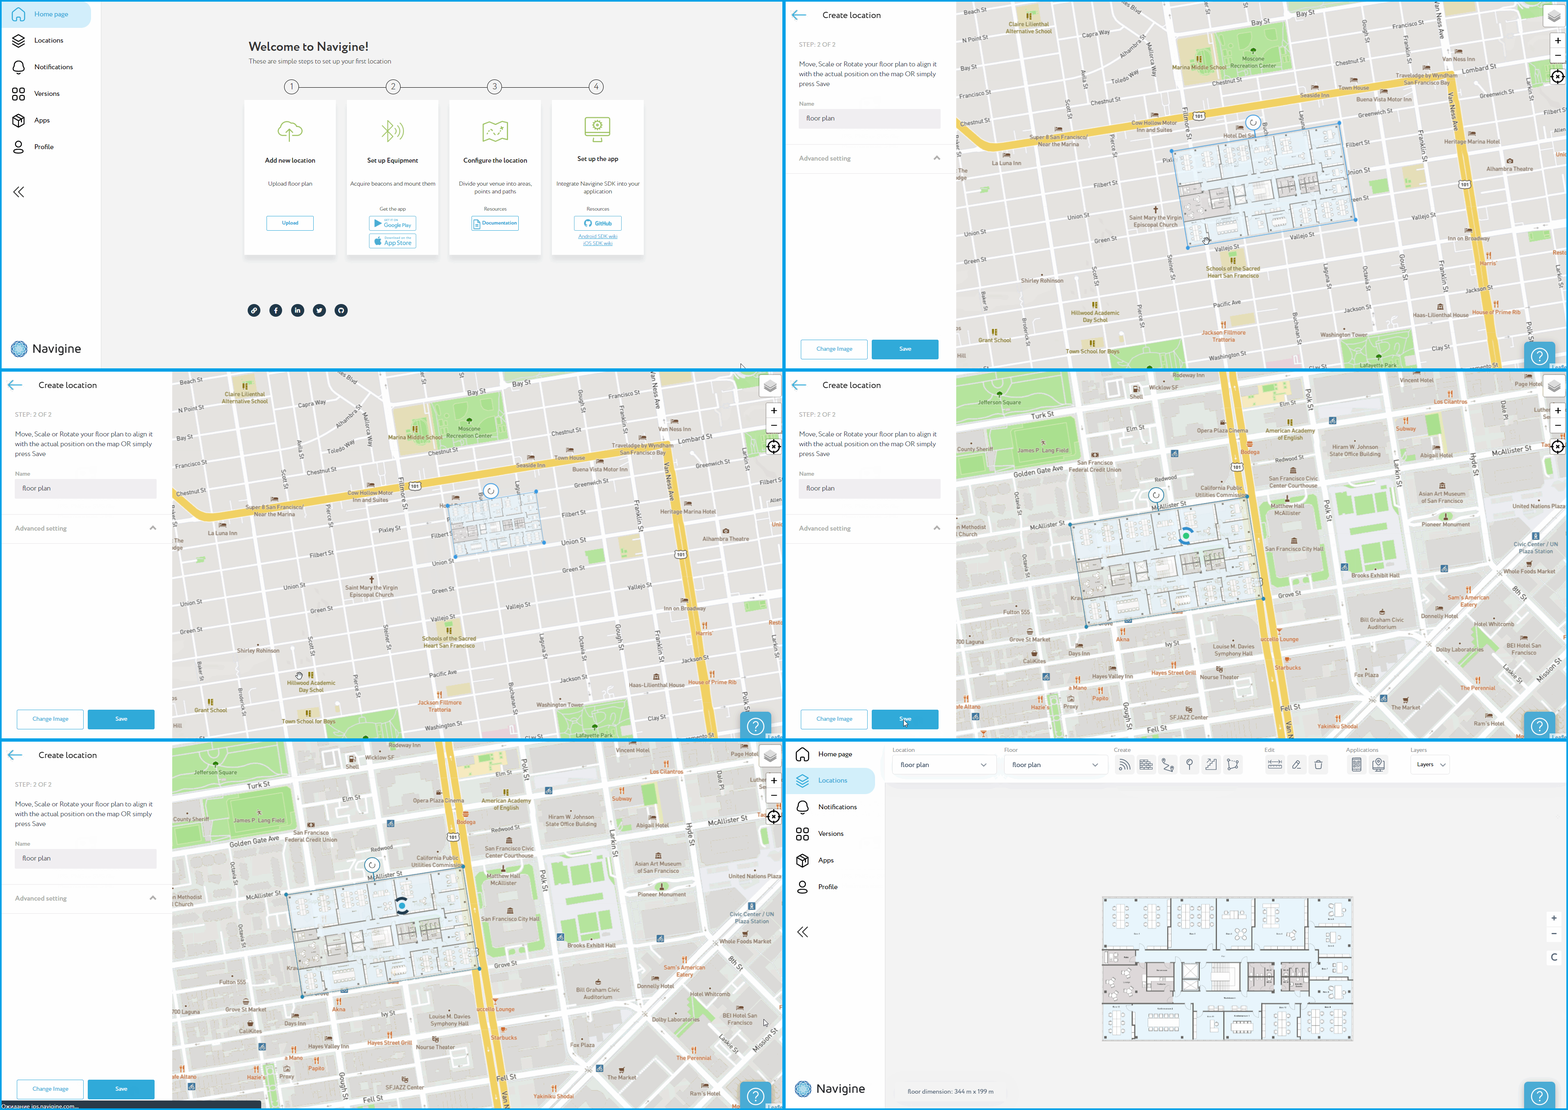
¶ Step 1: Upload Image of Floor Plan
To begin, navigate to location.navigine.com and upload a floor plan image, which will be used as the foundation for all further actions such as beacon placement, barrier drawing, and route creation. For a more comprehensive guide, please visit the link.
¶ Step 2: Add beacons
- Click on "Add transmitter" and select the location where you want to add the transmitter.
![]()
- Choose the type of transmitter: BLE
![]()
-
Enter the name of the device and its MAC-address.
-
Click on the "Add" button.
![]()
¶ Step 3: Draw Barriers on Closed Locations and Walls
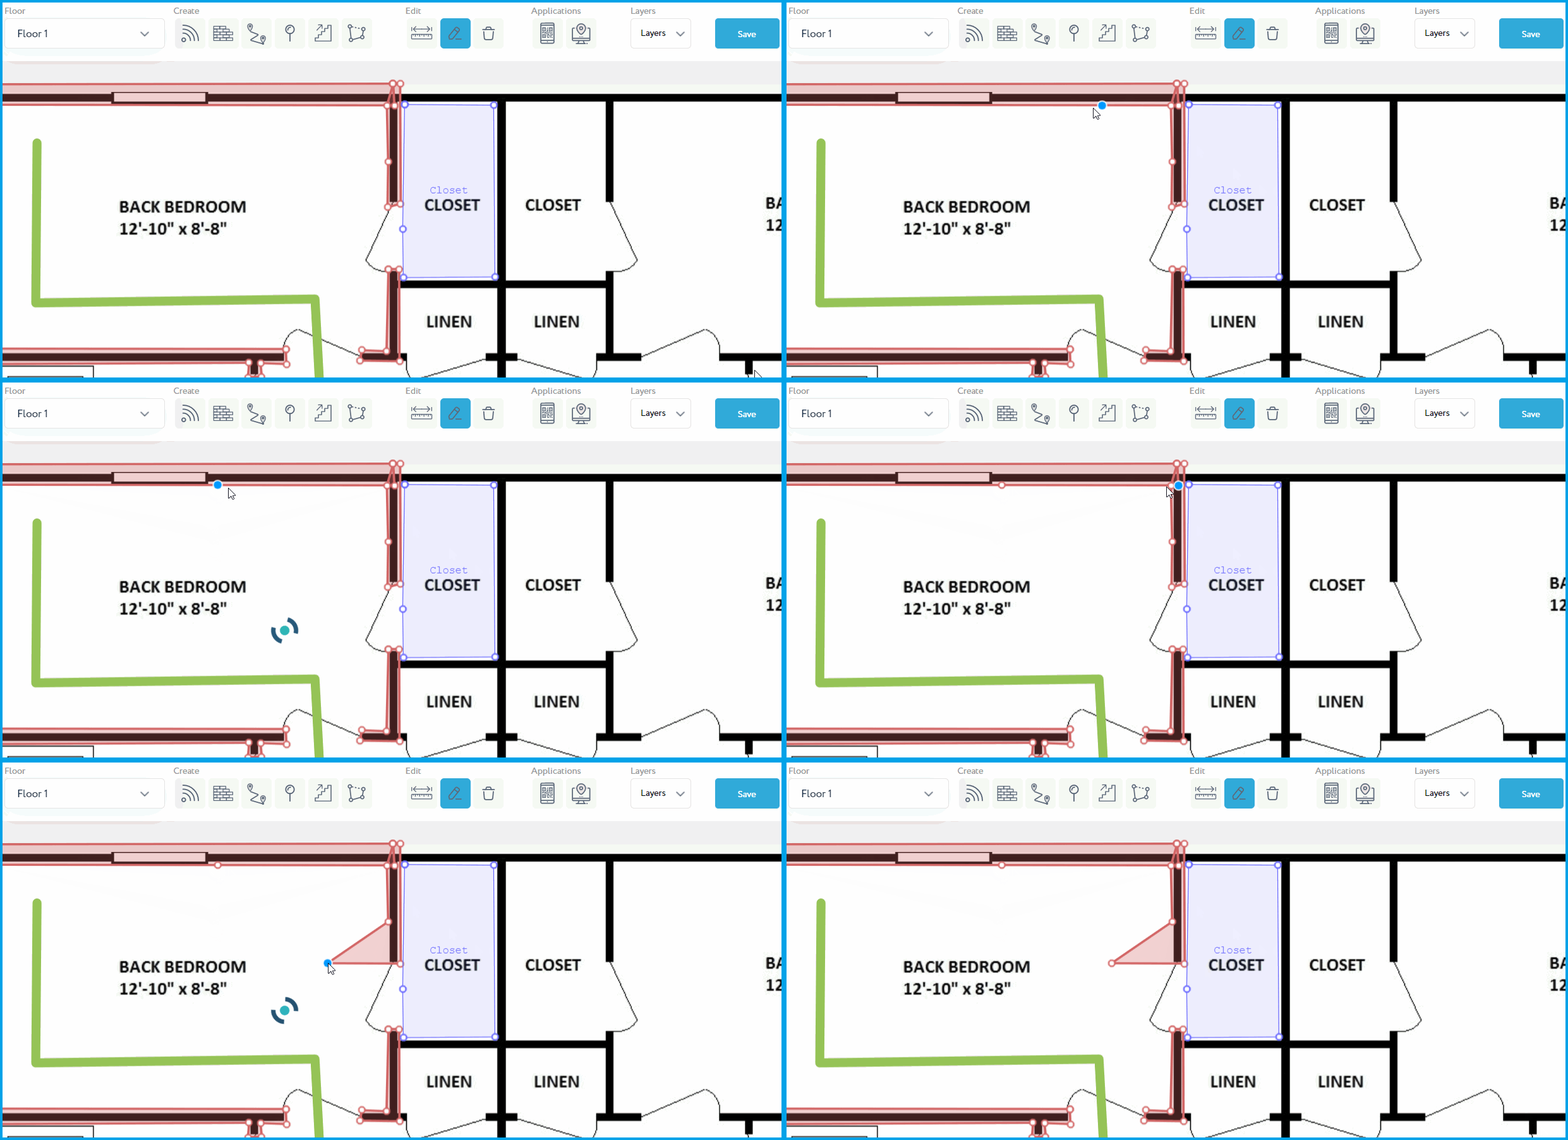
After uploading the floor plan, the next step is to draw barriers on closed locations and walls. Barriers define areas of the floor plan that are off-limits to navigation and will help to ensure that the navigation system accurately reflects the layout of the building. To access a more detailed manual, visit the link
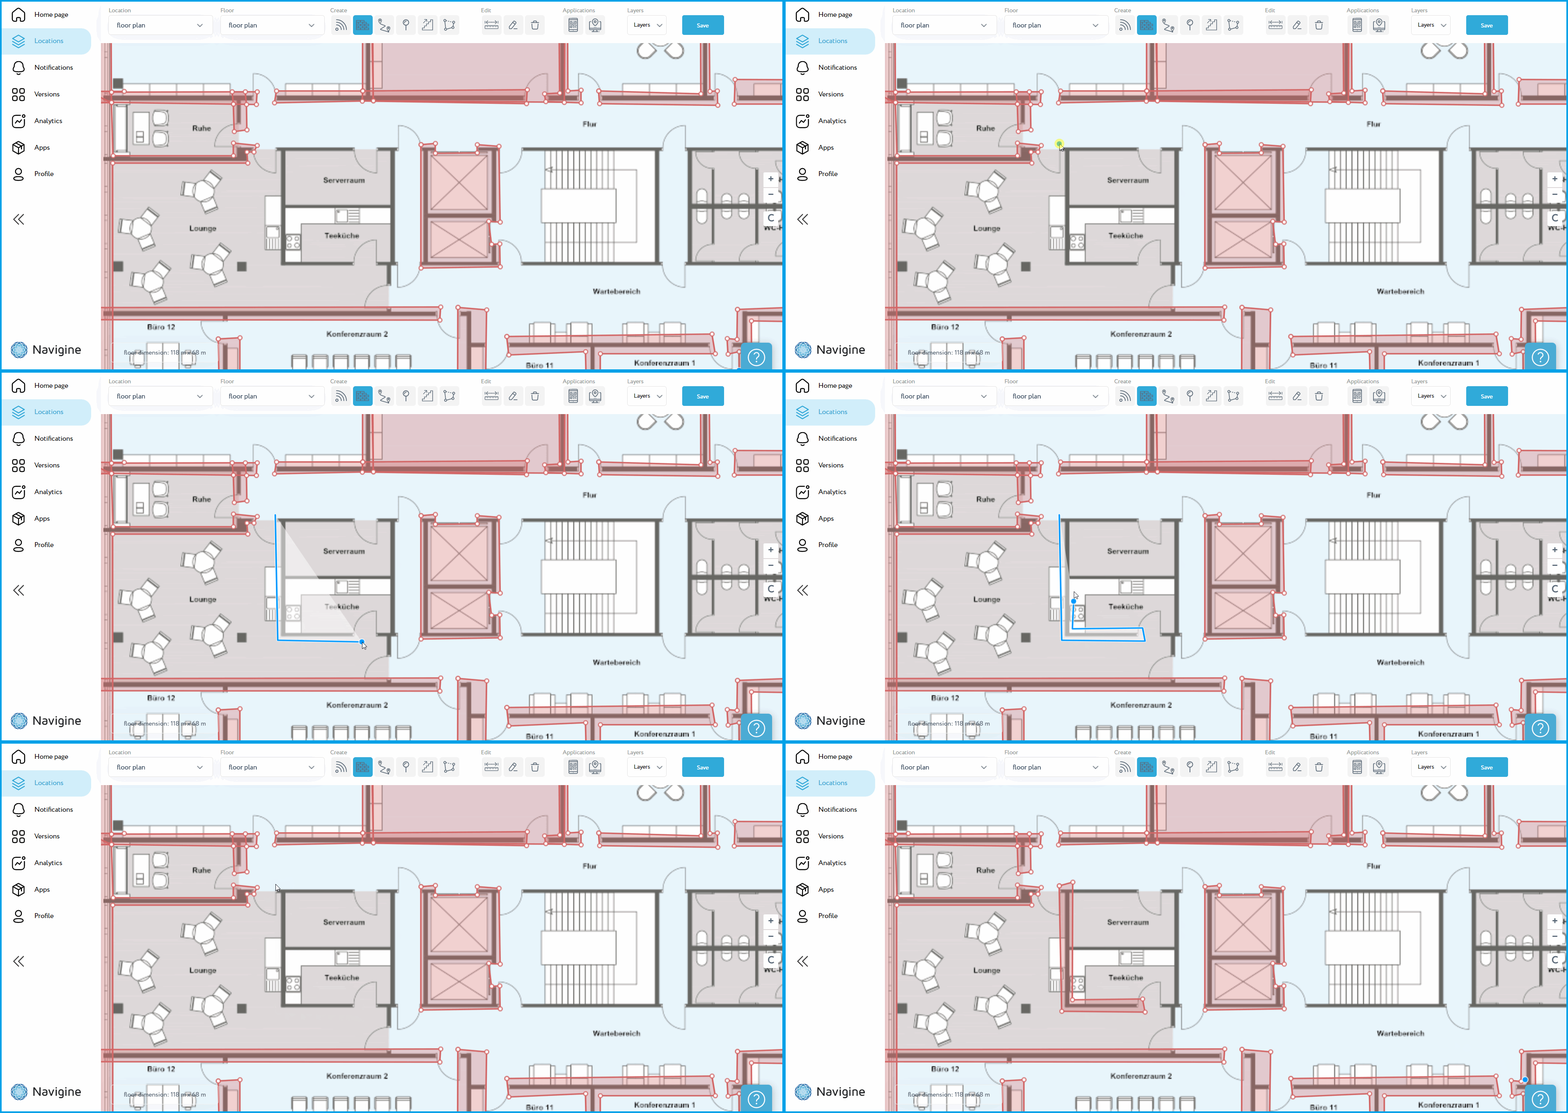
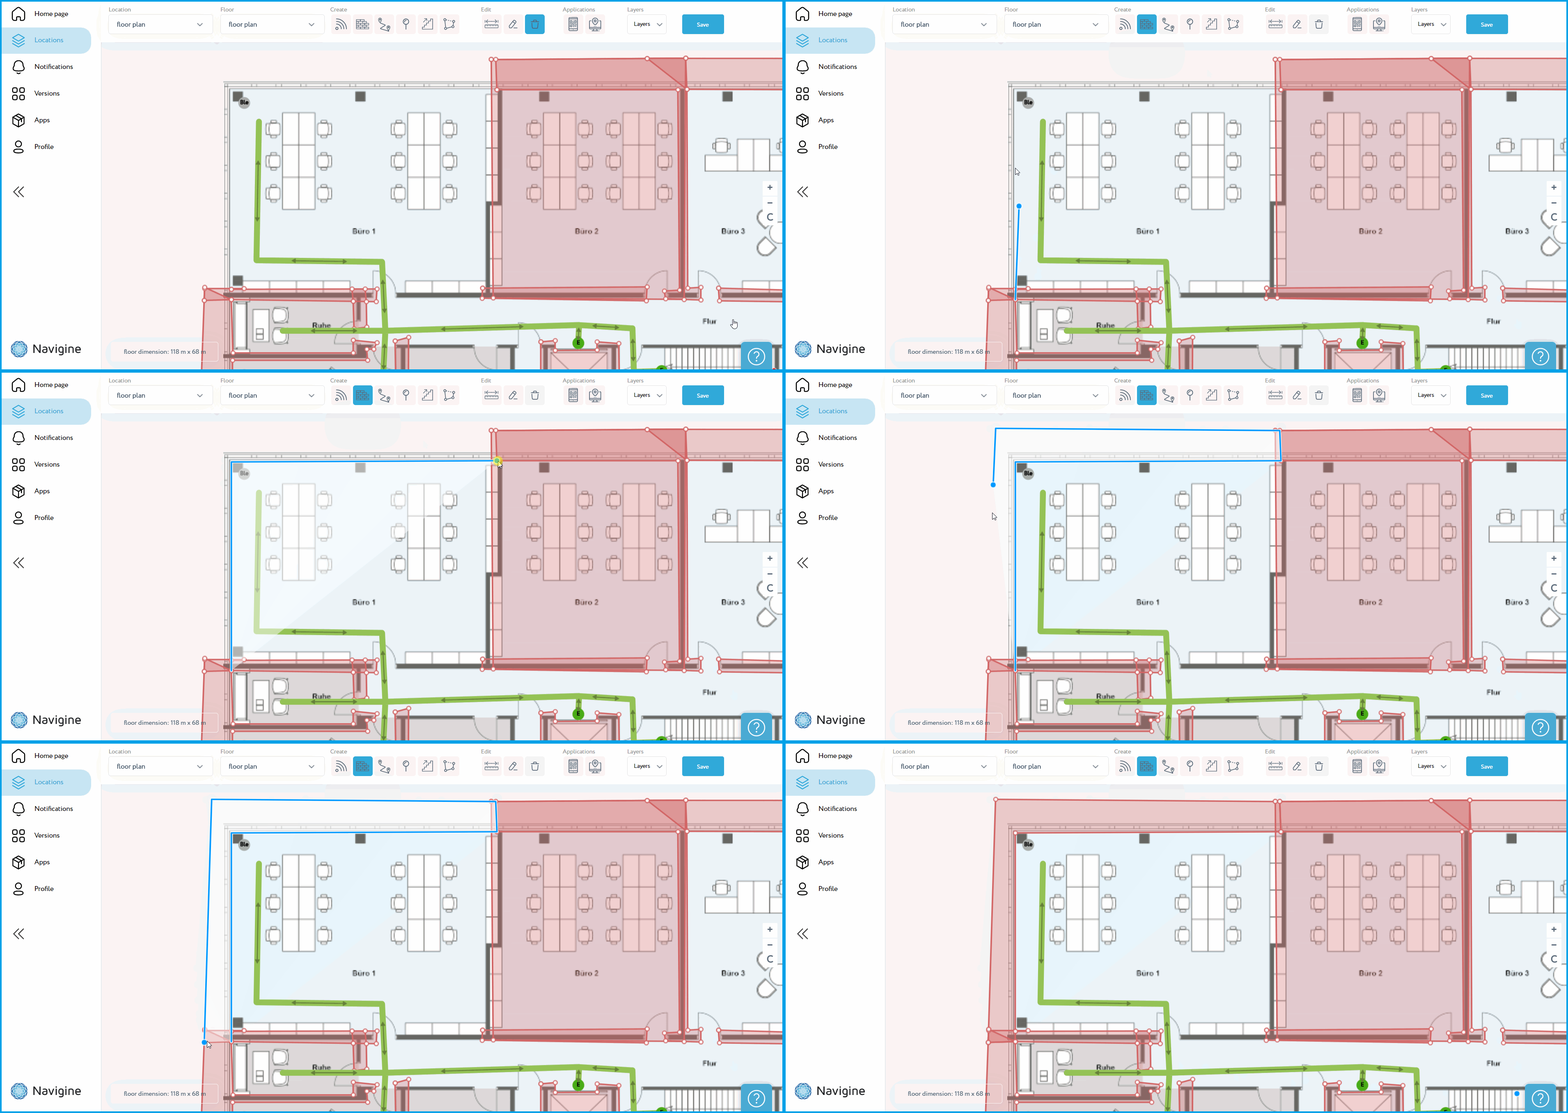
NOTE: To ensure the accuracy of your indoor navigation, it is important to properly overlay barriers on your floor plan. This will prevent the navigation from going outside the boundaries of the image. When you draw a new barrier, make sure it is placed within the borders of the floor plan image as on pic 3.
¶ Step 4: Draw zones
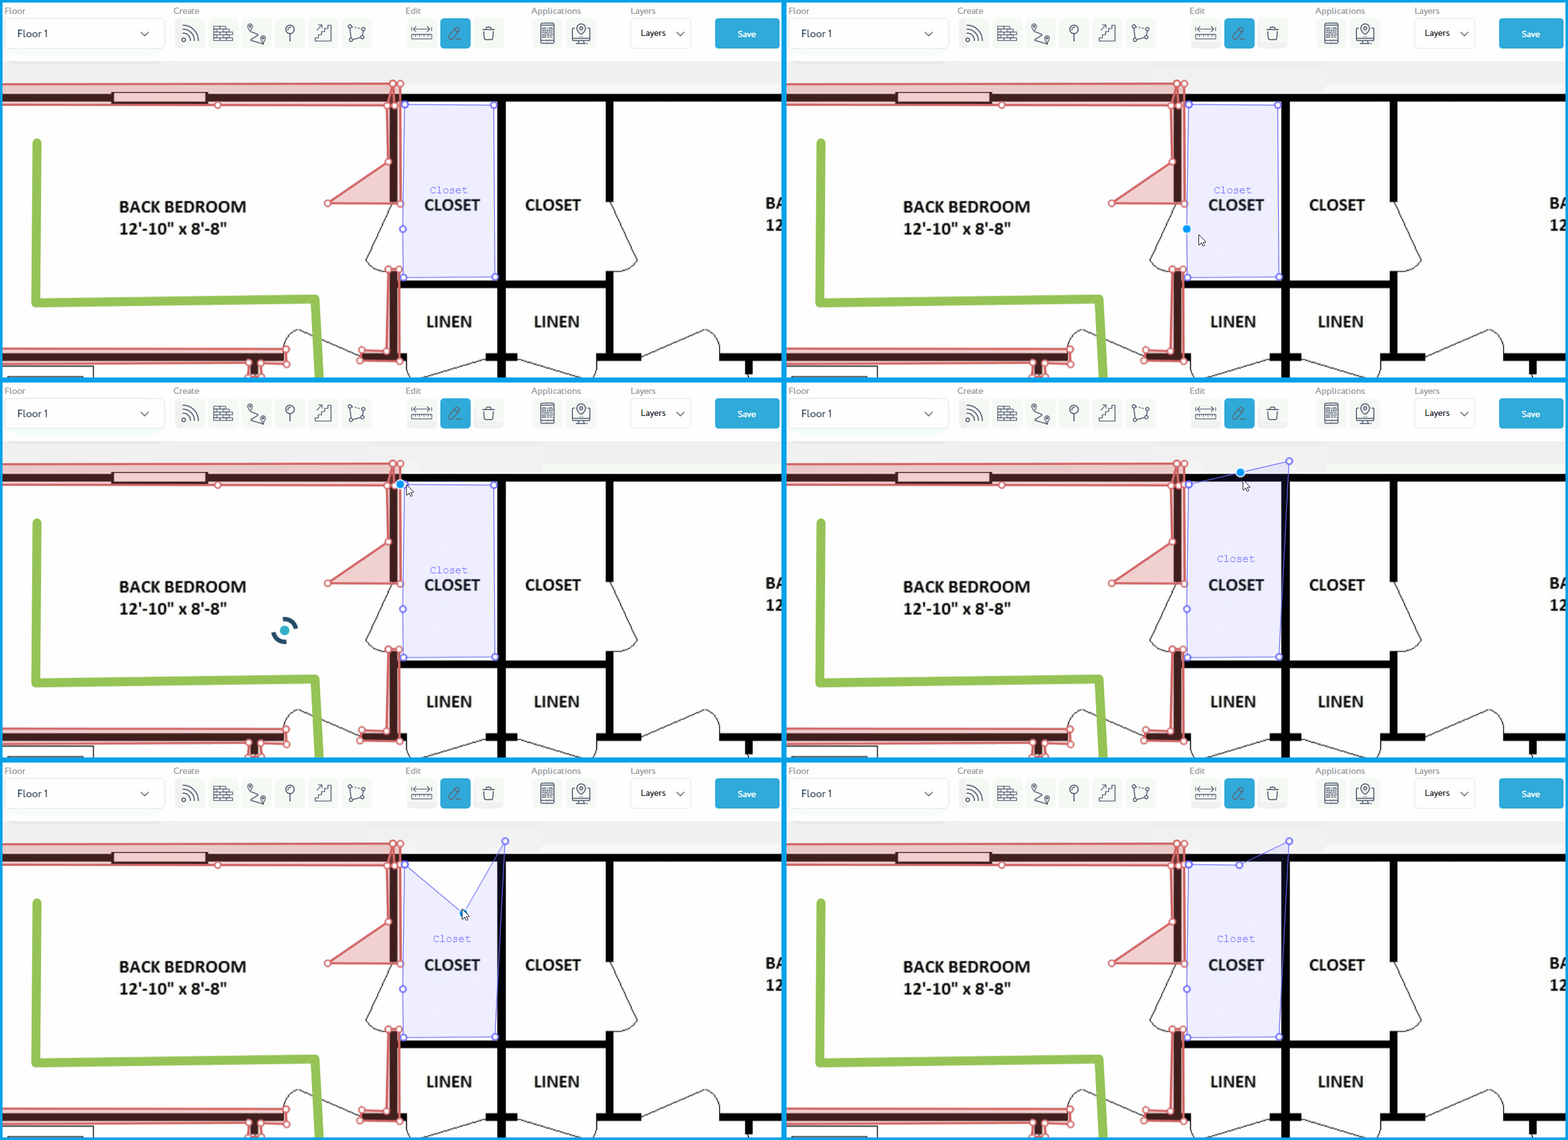
Finally, if desired, users can draw zones. By creating zones, users can easily see specific locations where people are. To access a more detailed manual, visit the link
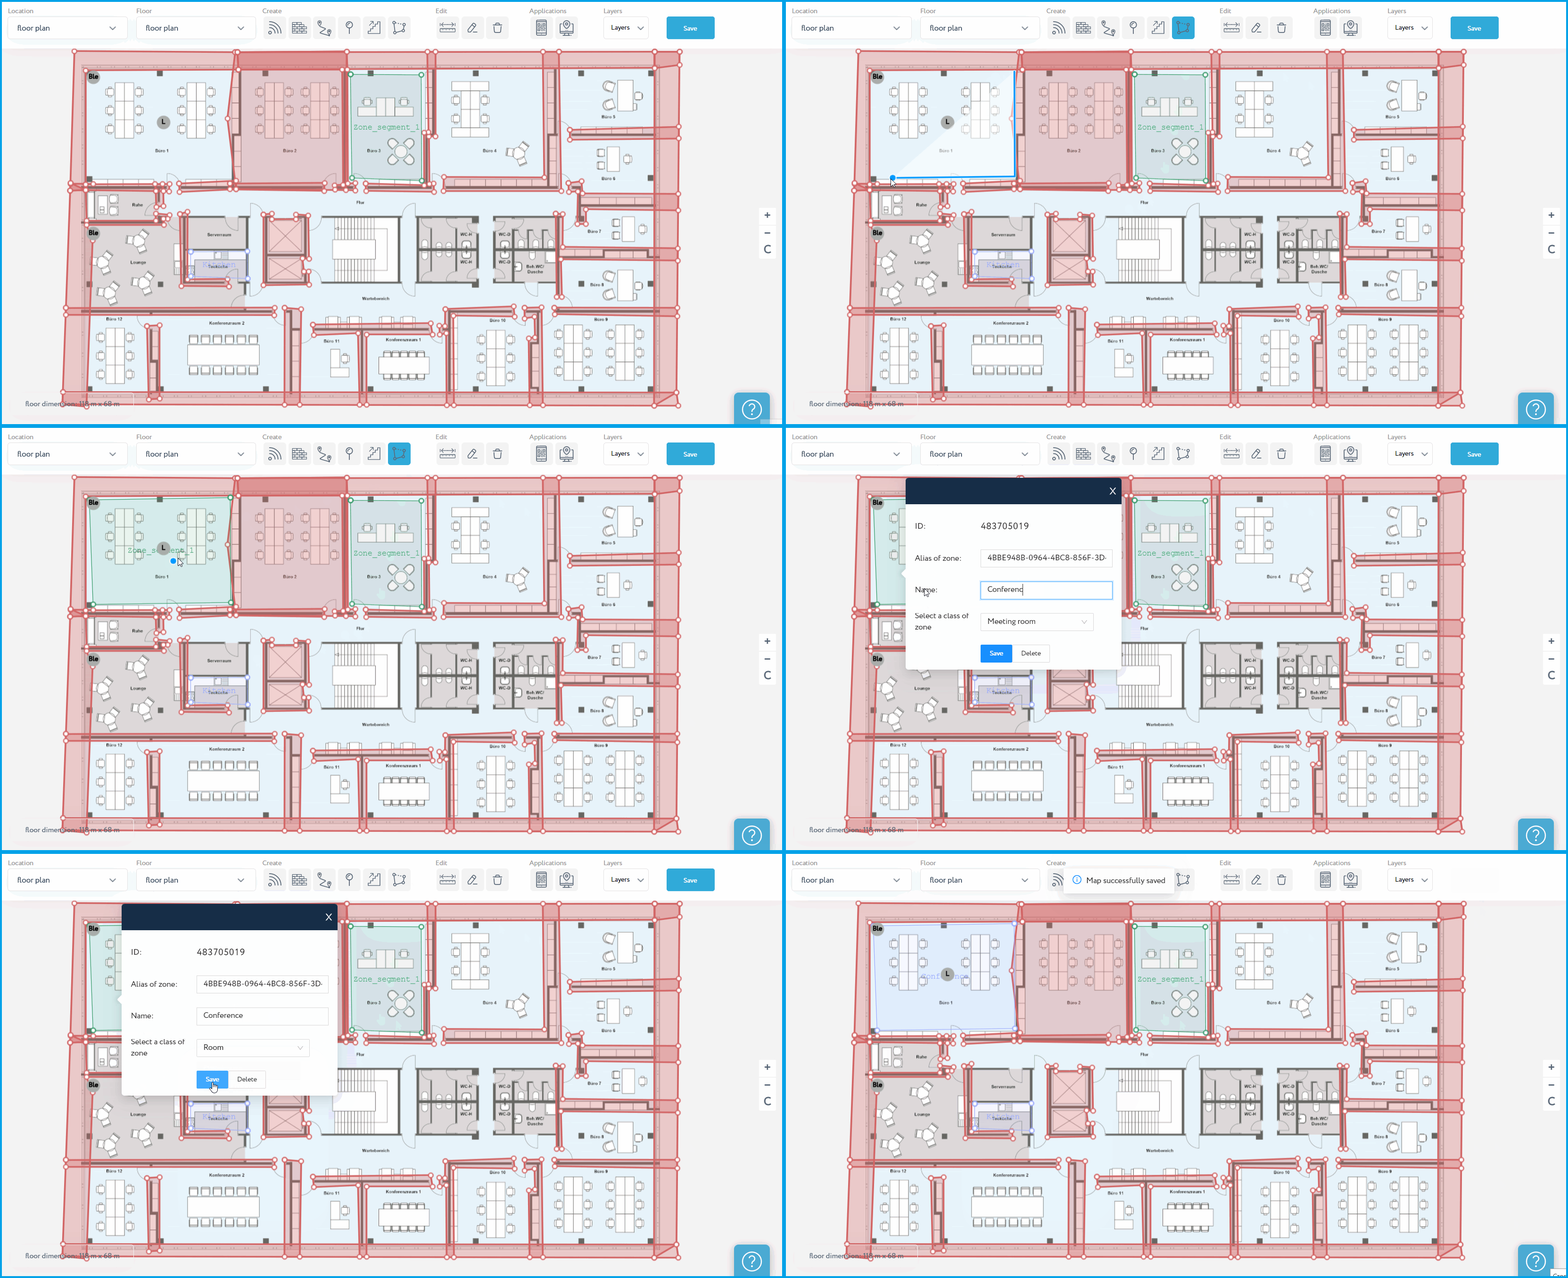
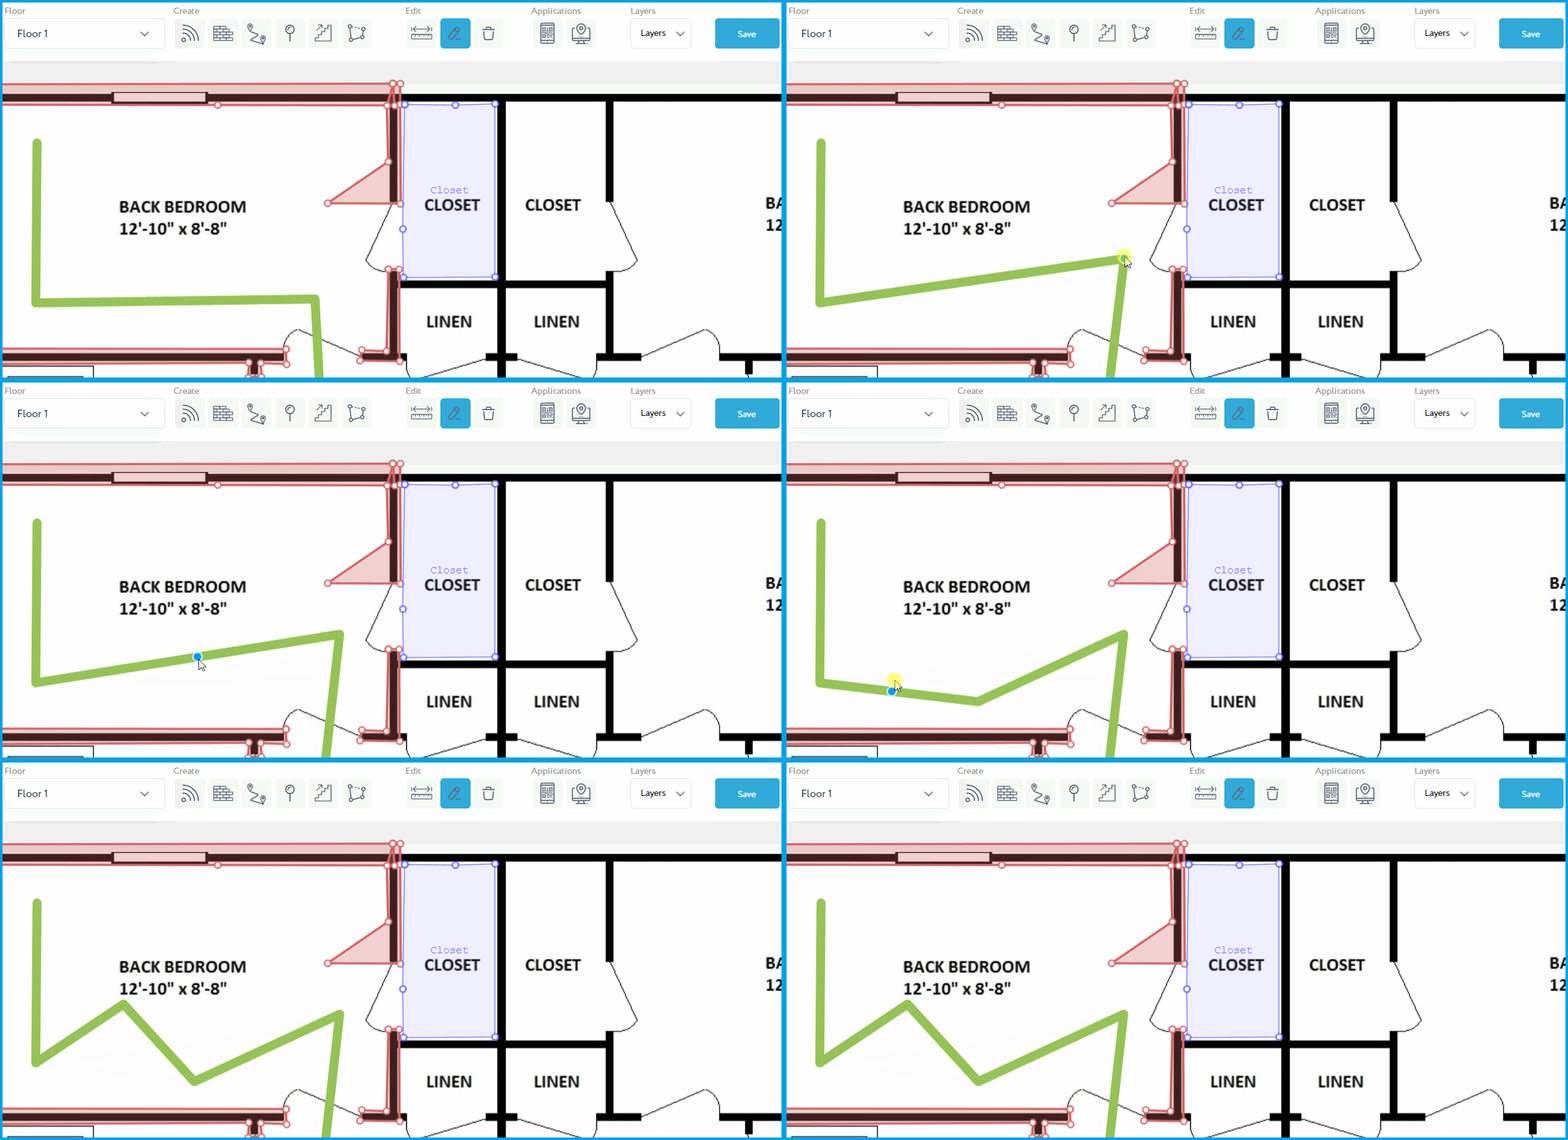
NOTE: You can edit drawn routes and barriers tool allows you to make changes to routes, barriers, and zone that you have previously created. To edit a route or barrier or zone:
- Click on the Edit elements on map tool icon in the toolbar to activate it.!
Pic. 14 Toolbar 2. Drag and drop the mark of the object to its new position. This will move the route or barrier to the new location.
Pic. 15 Editing barrier
Pic. 16 Editing zone
Pic. 17 Editing route 3. Click the Save button in the top right corner to save all changes.
¶ Step 5: Enable the location
Once you have selected the location, you need to enable it. This is done by switching the Enable button to the On position.
![]()
¶ Step 6: Go to rtls.navigine.com
Once you have configured the location, you need to access the Navigine server to set up online tracking.
To access Asset Tracking, simply click on the "Open Asset Tracking" option located on the toolbar at the top right corner or go to rtls.navigine.com and log in to your account.
![]()
![]()
¶ Step 7: Add Teltonika devices as objects
For each device or asset, you will need to enter the settings for the object, including its name, type, and the beacon or locator it is associated with. Once you have entered all the information, click on the Save button to create the object.
![]()
By following these steps, you should now be able to set up online tracking and monitor the real-time location of your devices, assets, and people in your chosen location.
¶ Step 8: Add notifications (optional)
This particular section is designed to activate the geofencing feature. When there is a movement across the designated zone, a notification will pop up on the top-right corner of your screen. You can utilize the provided link to include additional notifications.
¶ Step 9: Complete Online tracking
Once you have completed all the necessary steps, you will be able to observe the movement of objects on the map.
![]()

